
tl;dr: We’re going to connect a physical button to a Raspberry Pi that that makes Screenly OSE skip to the next asset using Node-RED.
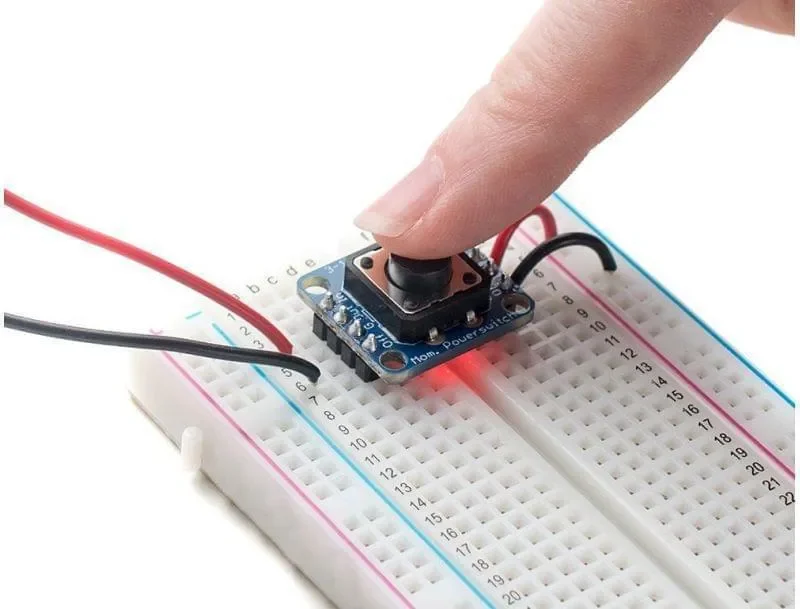
Adafruit push button that can be bought at from ModMyPi
The last few years have been amazing in terms of innovation around Internet of Things (IoT). With hardware like the Raspberry Pi, Arduino, BeagleBone et al, the cost of creating a hardware prototype has gone down from $HIGH_NUMBER to $VERY_AFFORDABLE for many hardware projects.
I’ve personally never been much of a hardware guy. If someone gave me an Arduino just a few years ago, I would have no idea what to do with it. The Raspberry Pi however changed all of that for me and it opened my eyes to the hardware world and made me realize it wasn’t as complicated as I thought.
To illustrate that this isn’t as complicated as many think, I’m going to show you how to build a hardware button that interacts with Screenly OSE (the most popular digital signage player for the Raspberry Pi). The tool we will use to glue all this together is a called Node-RED, which is a visual programming tool.
The hardware
Before you begin, you need the following hardware:
- A Raspberry Pi (preferably a Model B 2 or 3) complete with power supply, MicroSD card etc.
- A button or some kind of sensor. I used a button from a SunFounder kit. Another example of how to do this can be found here.
- Depending on your hardware, you might also need a breadboard, jumper wires etc.
The wiring to your Raspberry Pi will vary depending on what sensor/button you’re using, but in this example, we’ll use GPIO17 (PIN 11) for the button.
Installing Screenly OSE
Since Screenly requires a fair amount of changes to the system, it requires a dedicated installation. The easiest way to get started is to simply fetch the latest disk image from GitHub and flash it out to an SD card using Etcher (check out our screencast for more information).
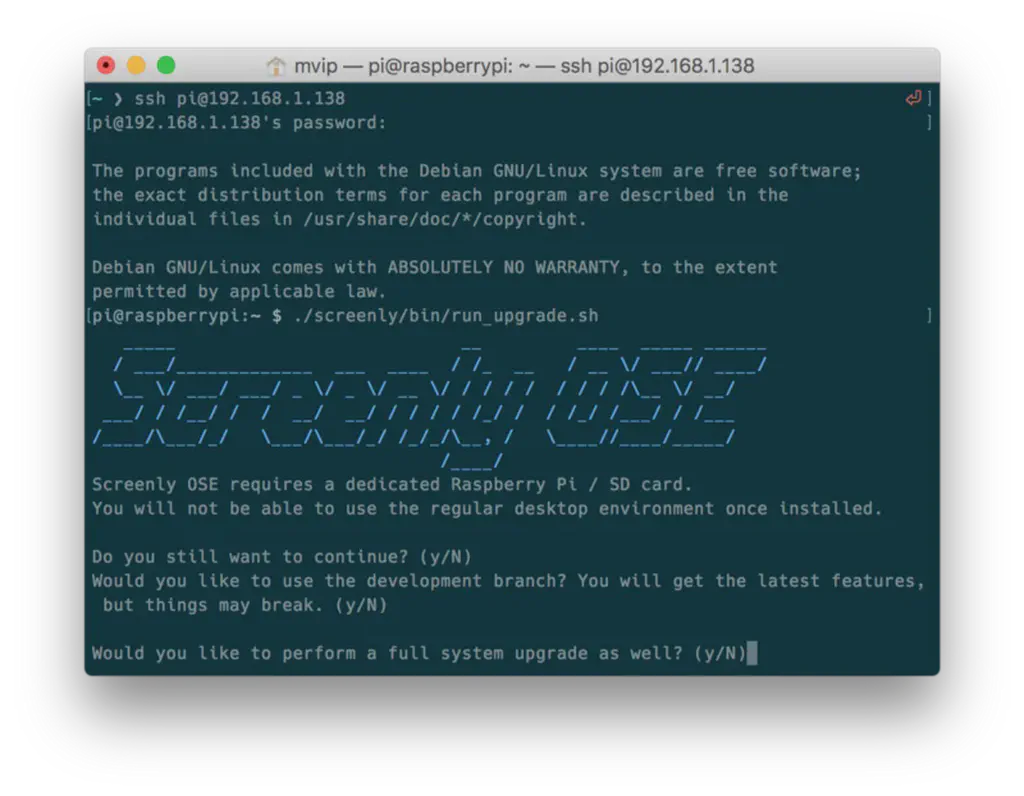
With Screenly installed, SSH into your the device (the default Raspbian credentials are set) and then run the upgrade script to bring the installation up to date by running ./screenly/bin/run_upgrade.sh as show below.
Once you’ve upgraded the system, you can point your browser to port 8080 on the device and start programming the content you want to display on your screen.

When you’re happy with the content, let’s move on to installing Node-RED.
Installing Node-RED
The installation instructions for installing Node-RED on a Raspberry Pi can be found here. This process will take a bit of time (in particular if you’re running on an older Raspberry Pi).

Once you have Node-RED installed, I’d recommend that you configure it to automatically start on boot. This is done using the command
sudo systemctl enable nodered.serviceand then start the service by running
sudo systemctl start nodered.serviceYou should now be able to access Node-RED on port 1880 on your device.
Introduce Node-RED to Screenly OSE
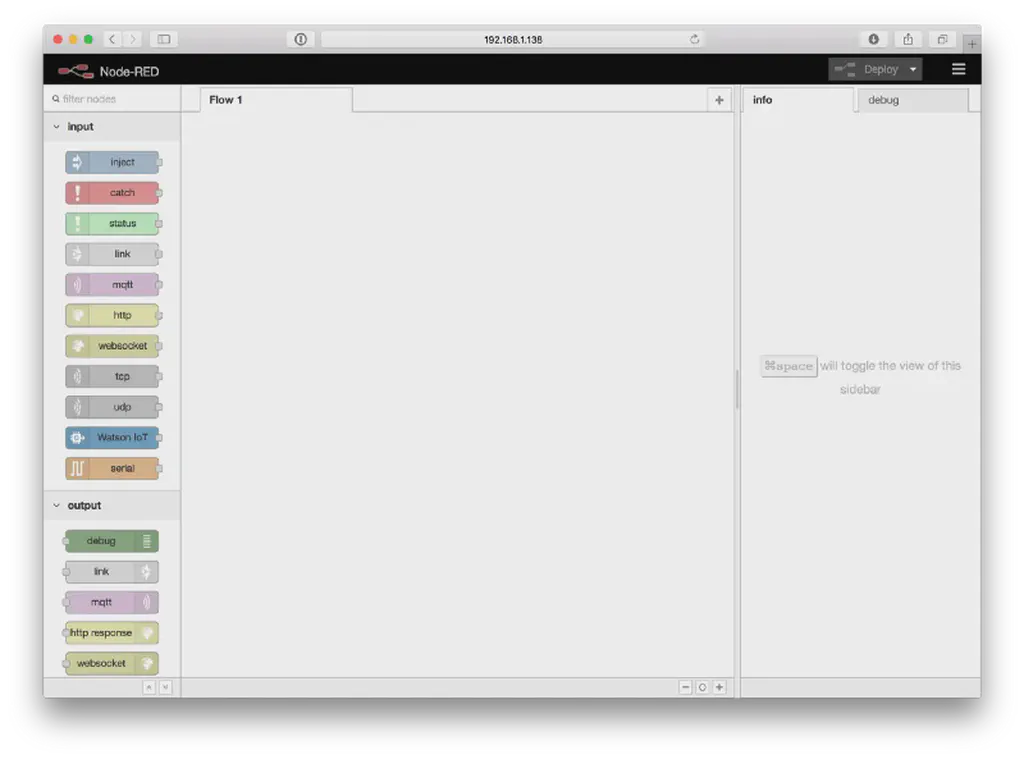
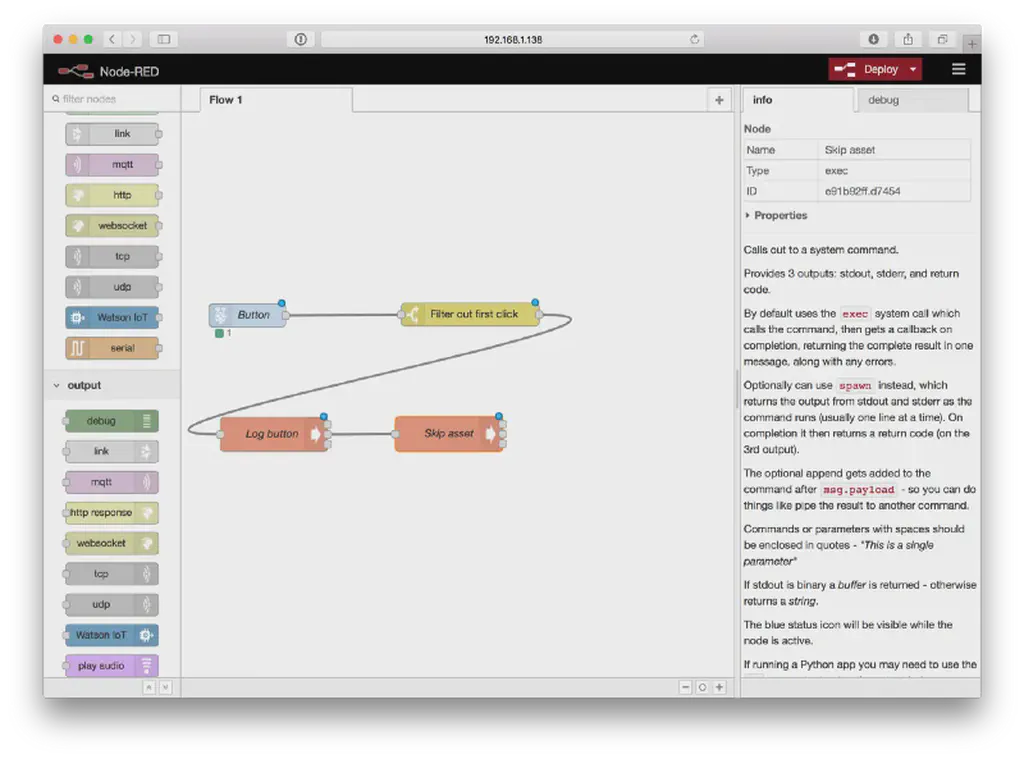
This is where the fun begins. You should now be able to see something like this when you point your browser to Node-RED:
Here’s a summary of the workflow created below:
- Listen when there is the GPIO pin is triggered
- Log this to the system logs
- Tell Screenly OSE to skip to the next asset
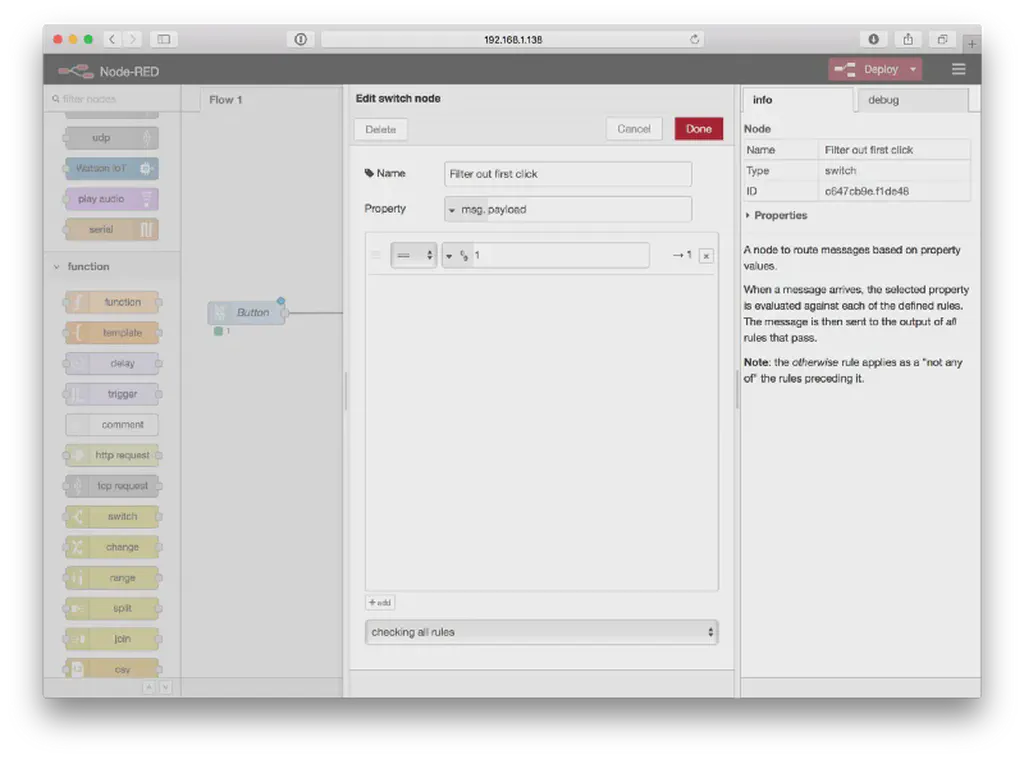
The first thing you need to do is to configure the button. You’ll find this under the Raspberry Pi section in the left under rpi_gpi. Make sure you use the one with the connector on the right, as we want to use it as a input, not as an output. Drag it out to the workspace and double click on it to bring up the dialogue.

As you can see, I’ve configured it to use Pin 11 / GPIO17. Depending on the wiring, you will need to modify this.
My particular button will fire twice (once when you click and then a reset a few ms later). To remedy that, I’ve added a switch to only listen on everything other than the first click. Otherwise, the workflow would double fire every time the button was pressed. You may or may not need this.
Next, let’s add some logging to the system so that we have a track record of clicks. To do this, we’ll use the exec functionality in Node-RED to run the command logger command.
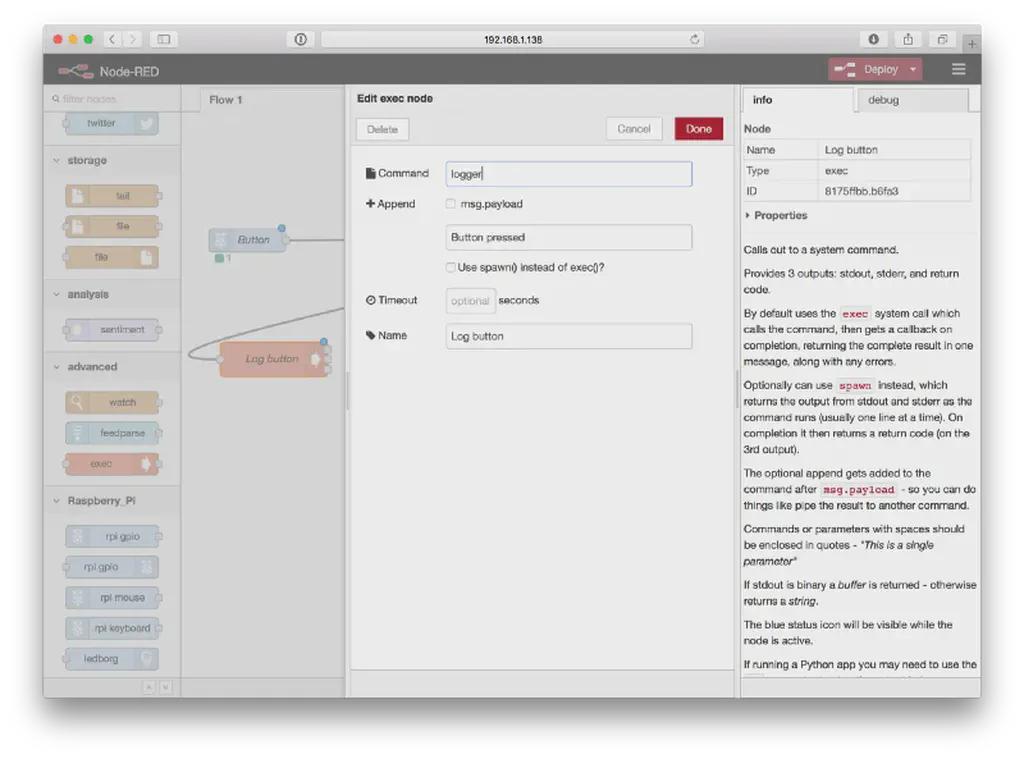
logger command.
We can now deploy the workflow using the Deploy button. If you SSH into your Raspberry Pi again now and run sudo journalctl -f you should be able to see the activity from Screenly OSE, along with other system activities.
If you press the button, you should be able to see something like:
> Apr 09 20:15:16 raspberrypi logger[18529]: Button pressedIf you don’t something likely went wrong in either the wiring or the configuration. To troubleshoot this, you can add a output in Node-RED to make sure you can see the activity direct in the web interface.
If however, you did get the logging message, we can proceed to the final step that bridges Node-RED and Screenly OSE.
To do this interaction, we use the same exec functionality as we used above.
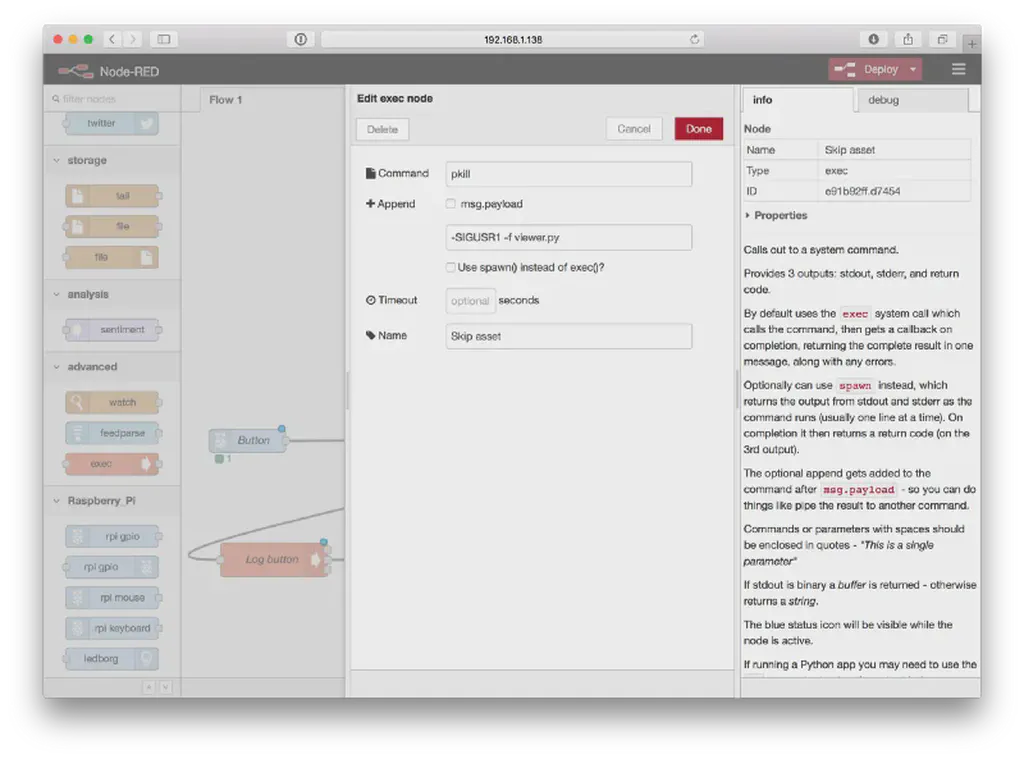
The only difference is that we use the pkill command to send the SIGUSR1 signal to the player. This signal tells the player to skip the current asset and move on to the next asset.
The final workflow should look something like this:
See! That wasn’t very hard. In this particular example, I used a button, but that could equally well have been any kind of sensors. Moreover, we’re only scraping on the surface of Node-RED. Within a few clicks, you could add additional actions, such as having a tweet fired, or an LED light up as extensions to the workflow.
If you’re interested in a commercial solution, we have created something similar to this with Screenly’s paid version, thanks to our partnership with Evrythng. You can read more about that in the blog post When Products And Digital Signage Speak The Same Language.
Update: Since the release of this blog-post, we have updated our API to add better functionalities. You can read more about this in this article.