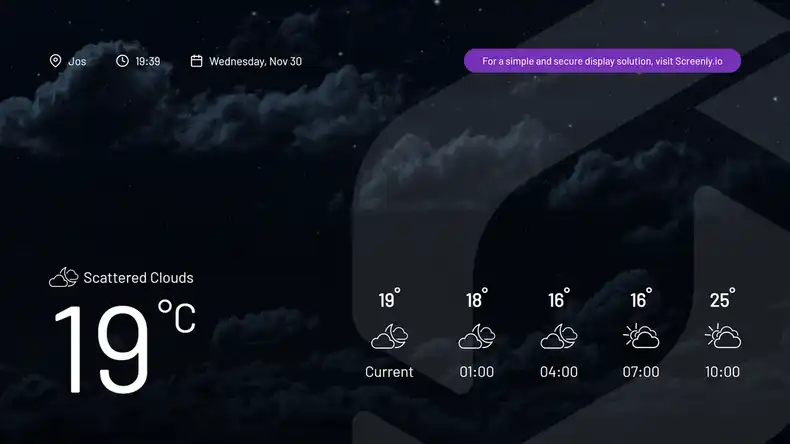
Many digital signage users and businesses need a way to display the weather forecast for a particular location on their screens. Screenly has made it easy to do so by providing a ready-to-use, free weather app.
The Screenly Weather App does not need any tweaking to make it look good on your screens. It is ready-to-go out-of-the-box. The Weather App is open source and free for all users.
The app will auto-locate your screen and display the local weather conditions for that location. However, you can override the auto-locate feature. This override capability is useful when users want to display weather data for another location.
The Screenly Weather App functions as a URL, and you can display this URL with any web browser or digital signage player that supports web page content.
To use the Screenly Weather App with Screenly digital signage software and a Screenly digital signage player, the first step is to get a Screenly account. If you do not have one, you can get started with a 14-day free trial.
After you register for your Screenly account, follow the article below for a step-by-step guide on how to display the weather forecast on your TV screens and monitors.
Step-by-step process to use the Screenly weather app within your Screenly account
Visit the Screenly App Store to access the Weather App.
Configure the Weather App settings. You can choose a 12h or 24h clock format and the location for your weather forecast. Next, copy the URL provided to your clipboard.
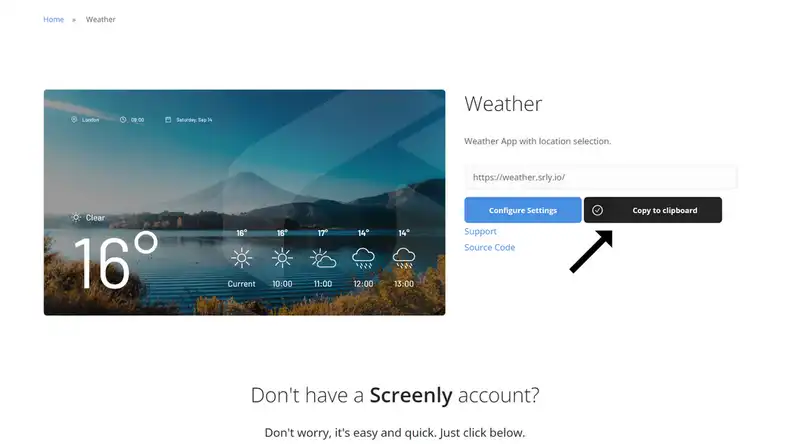
Log in to your Screenly account here. If you do not have a Screenly account, register for a 14-day free trial.
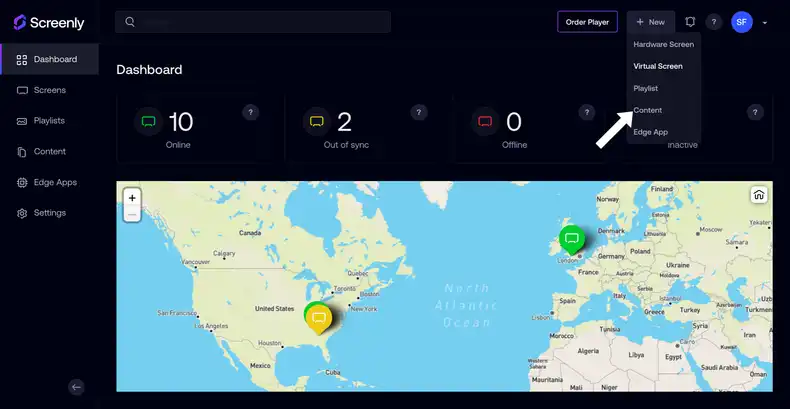
After you log in to your Screenly account, click the “New” button on the top right. Next, click on “Content” from the dropdown menu.
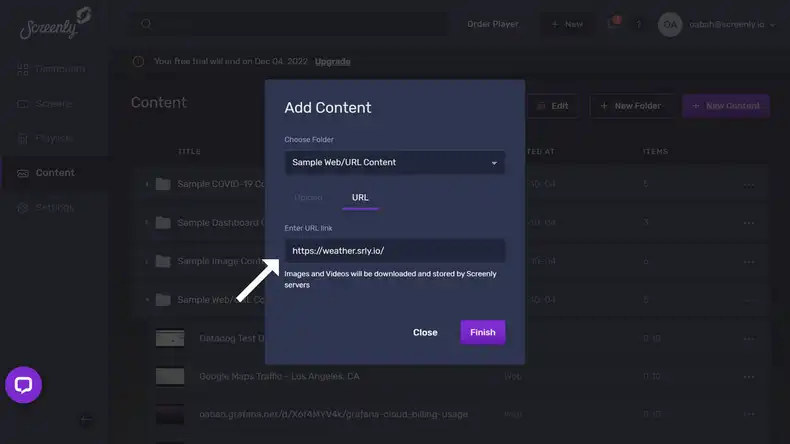
In the popup modal that loads, click the “URL” tab next to the “Upload” tab. Then, add the URL from the Weather App in the “Enter URL link” input field. Next, click the “Finish” button on the bottom right.
If you would like to display the local weather for the location of the screen without setting the location manually, you can click on “Advanced” link and tick the “Send Metadata” checkbox. This will display the weather forecast for the location of the screen.

This feature is super handy if you have lots of screens and want to display the local weather for each screen without having to create a new content item and link for each location.
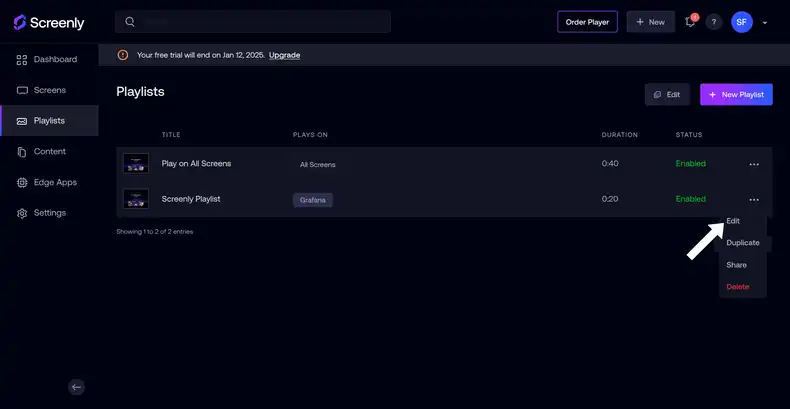
You can then assign the Weather App content item to a playlist in your Screenly account. To do so, click the “Playlist” icon on the left-hand menu. Then, click the three-dot button on the right side of an existing playlist and click the “Edit” button. Alternatively, you can create a new playlist by clicking the “+ New Playlist” button on the top right of the screen.
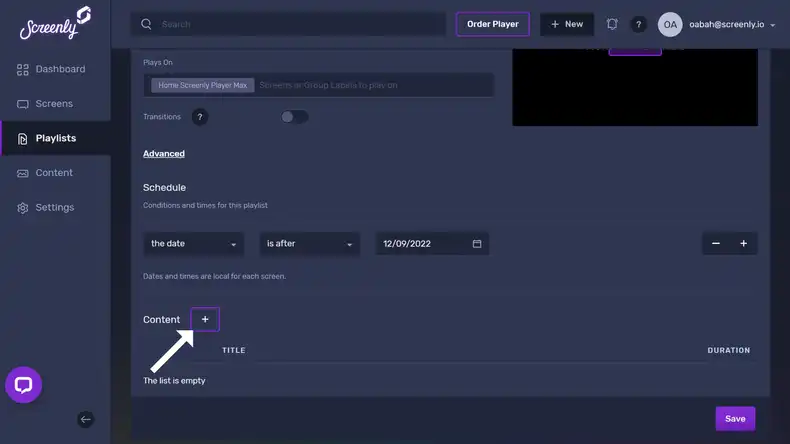
To add the Weather App URL content to the playlist, click the “+” button on the right side of the “Content” section within the “Edit Playlist” view. You can then select the Weather App URL from your content item collection.
Once you assign the playlist containing the Weather App URL content to a screen, the weather forecast will display on your TV or monitor in minutes.
The Screenly Weather App is open source. Users who want to make advanced configurations can do so by cloning the source code from the Screenly Weather App GitHub page.
If you have trouble getting the Weather App to display on your screen, we are here to help. Contact Screenly Support at any time - we always enjoy talking with our users.
