

Tableau is a popular tool for data visualization and communicating business metrics. One common issue with Tableau and other data visualization tools is that they often go ignored. It is difficult to get employees to review the dashboards regularly and consistently. With Screenly, users can display their dashboards on a large TV and make company data more accessible.
Displaying Tableau data dashboards on a TV is easy with Screenly. You can add, remove, and schedule dashboards remotely with an online Screenly account. You will need one digital signage player per screen. A digital signage player renders your Tableau dashboard content to your screen. Screenly offers both the Screenly Player and Screenly Player Max. You can learn more about each device’s unique features at the link here. We highlight the steps for displaying your Tableau dashboard on a TV below.
How to display a Tableau dashboard on a TV
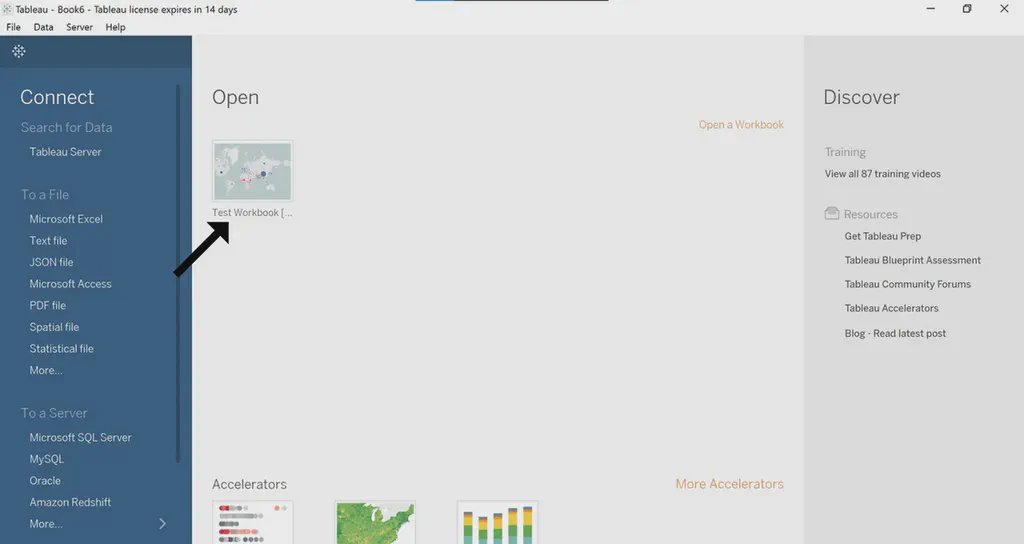
To show a Tableau dashboard on a TV, you will first need to make a public version of your Tableau dashboard. To do so from the desktop app, open the app and click on the workbook that contains the dashboard you would like to display.
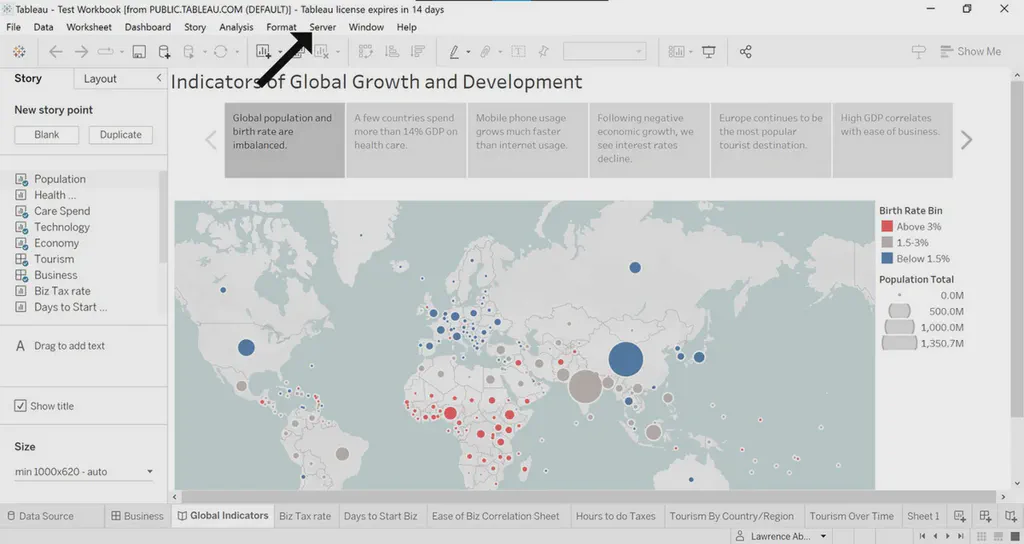
Click “Server” from the top menu to open a dropdown server menu for the workbook.
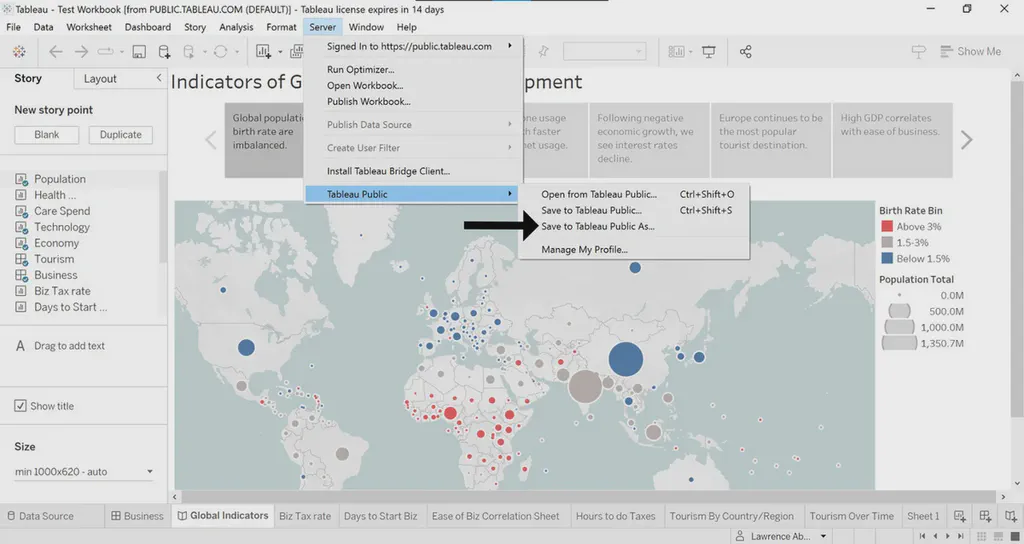
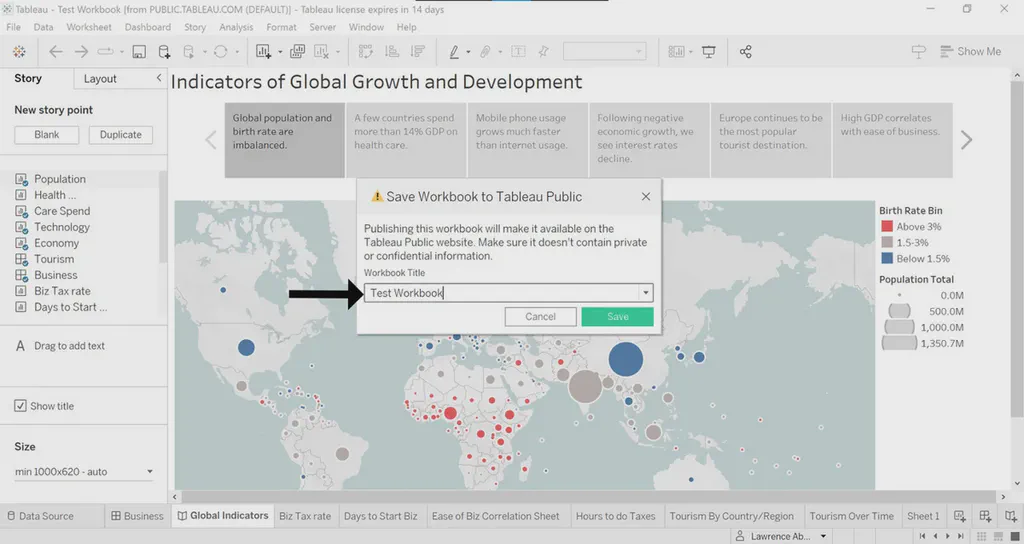
Hover over “Tableau Public” from the dropdown. Next, click “Save to Tableau Public As” in the sub-menu. You may have to create a Tableau Public account at this time. Next, you can provide a title for your public workbook.
The next step is to get the share link for your Tableau Public dashboard. After providing the title for your workbook, the workbook will be published and you will be redirected to the Tableau public website.
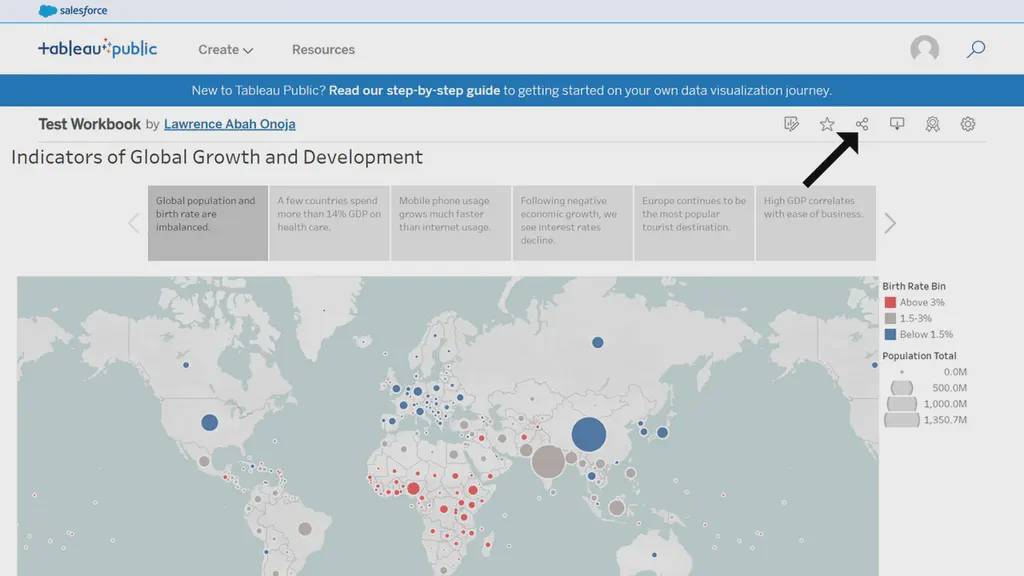
You can find the share icon at the top right of the dashboard. Clicking on the icon produces a pop-up modal containing the public link for the dashboard.
Copy this link, as this is the link you will use to add the Tableau dashboard as content to your Screenly account.
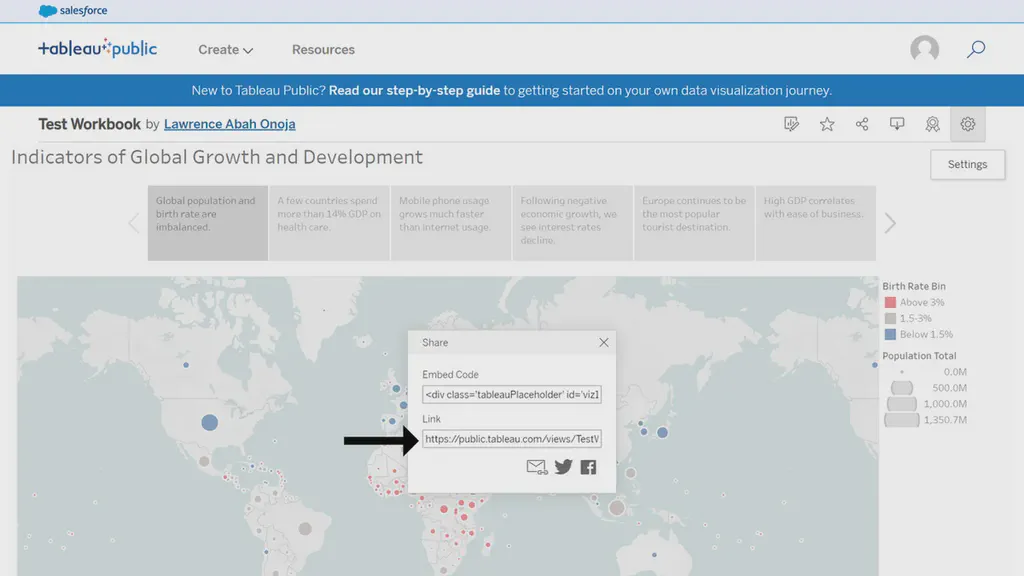
Note that if you wish to embed your dashboard in a custom webpage, you can also select the snippet in the Embed Code box. Using the embed snippet allows users to remove unwanted headers on their Tableau dashboard, but it is a more complicated process. The remainder of this guide focuses on using the public share URL.
Setting up your Tableau dashboard screen with Screenly
Now that you have a public share URL for your Tableau dashboard, you need to add the URL to your Screenly content library. To do so, follow the steps below.
Log in to your Screenly account here. If you do not have a Screenly account, register for a 14-day free trial.
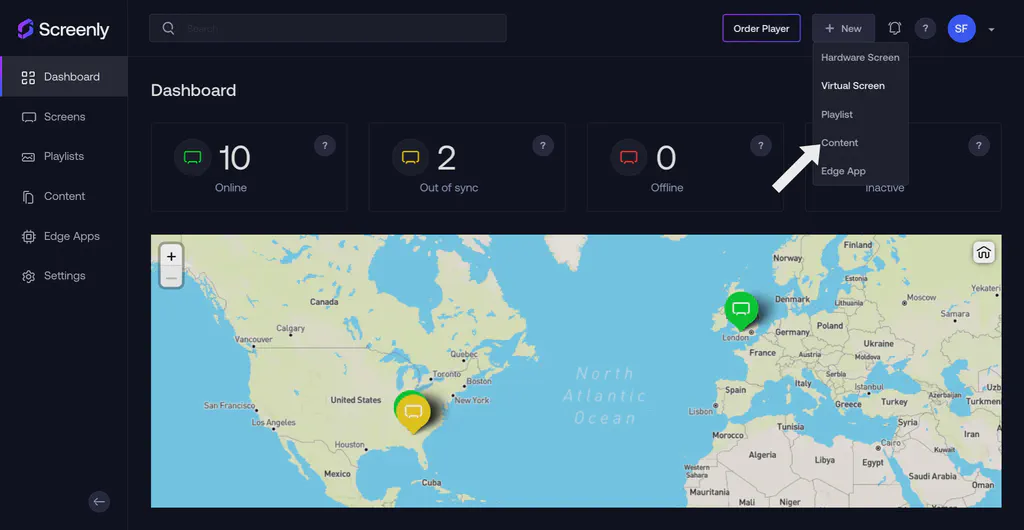
After logging in to your Screenly account, click on the “New” button on the top right of your screen. Then, click on the “Content” tab in the dropdown menu.
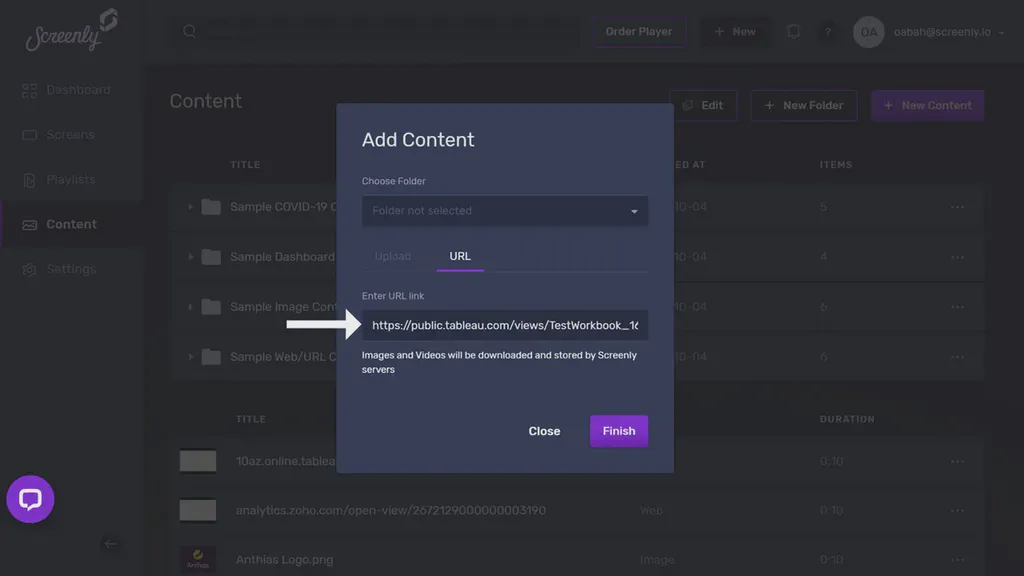
Next, click the URL tab in the popup modal and paste the public URL into the “Enter URL link” input field. Make sure to append “&:showVizHome=no” at the end of the URL for a better viewing experience. Be sure to click “Finish” on the bottom right after you successfully add the URL.
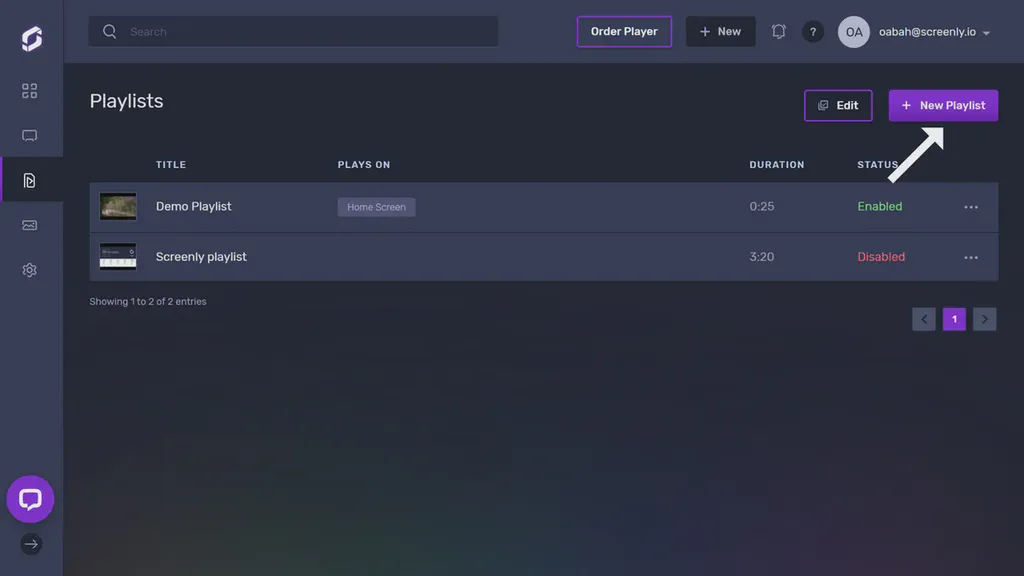
With the above steps completed, you can now add this asset to a playlist. To add your content to a playlist, click the “Playlist” tab from the left-hand menu. If you wish to add a new playlist, click the “+ New Playlist” button on the top right of the new screen that loads. To edit the new playlist or a previously existing playlist, click on the name of the playlist you wish to edit from the list of playlists.
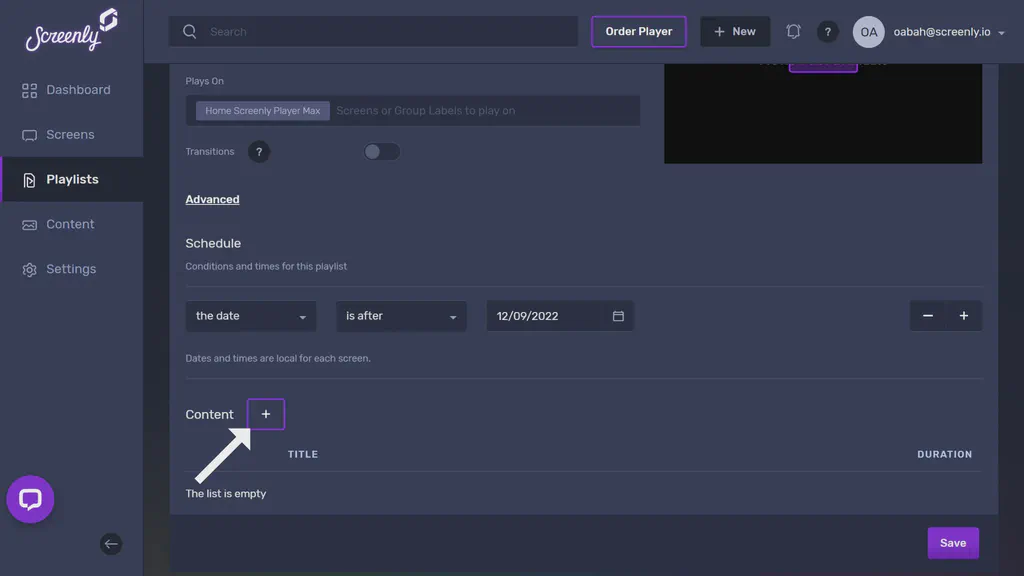
Within the playlist, click the “+” icon in the Content section. From there, you will see a popup that will allow you to add the Tableau dashboard content to the playlist from your content collection.
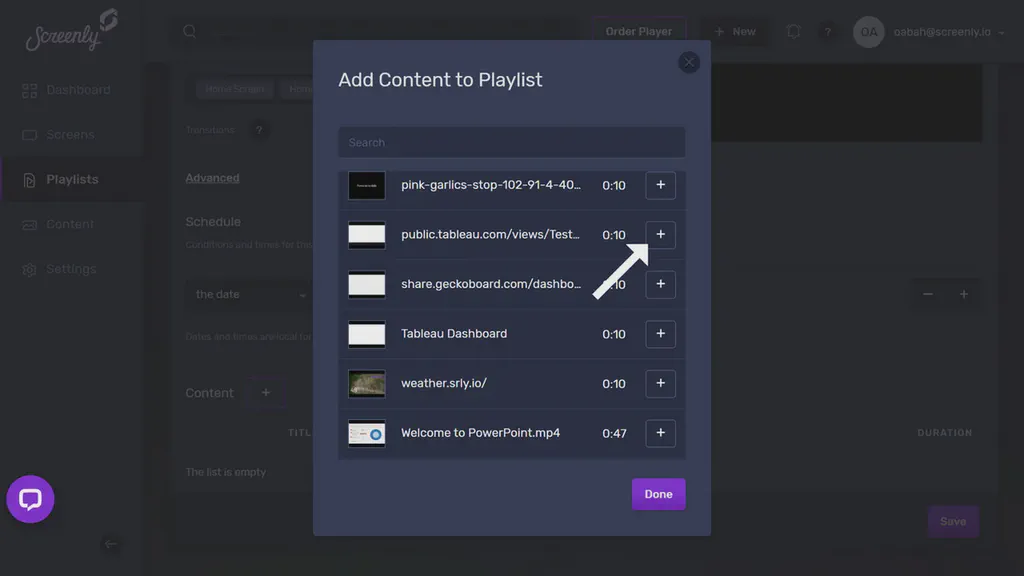
In the new “Add Content to Playlist” popup, find your Tableau dashboard content and click the “+” button next to the file. Then, click the “Done” button below.
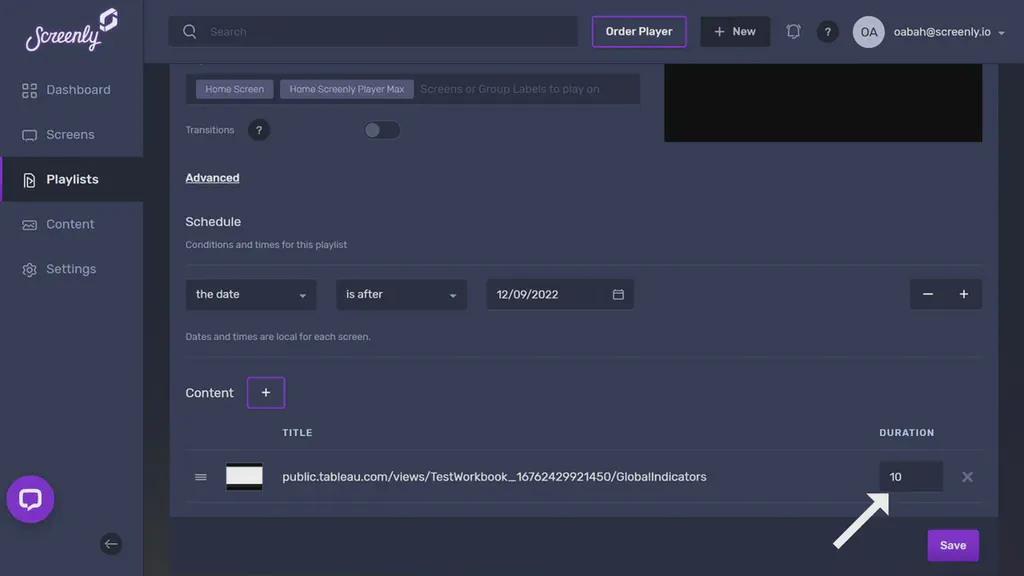
You will then see your Tableau dashboard in the playlist’s content section. Next to the dashboard content listing, change the listing’s duration to the time you want the dashboard display on your screen. Be sure to click “Save” on the bottom right.
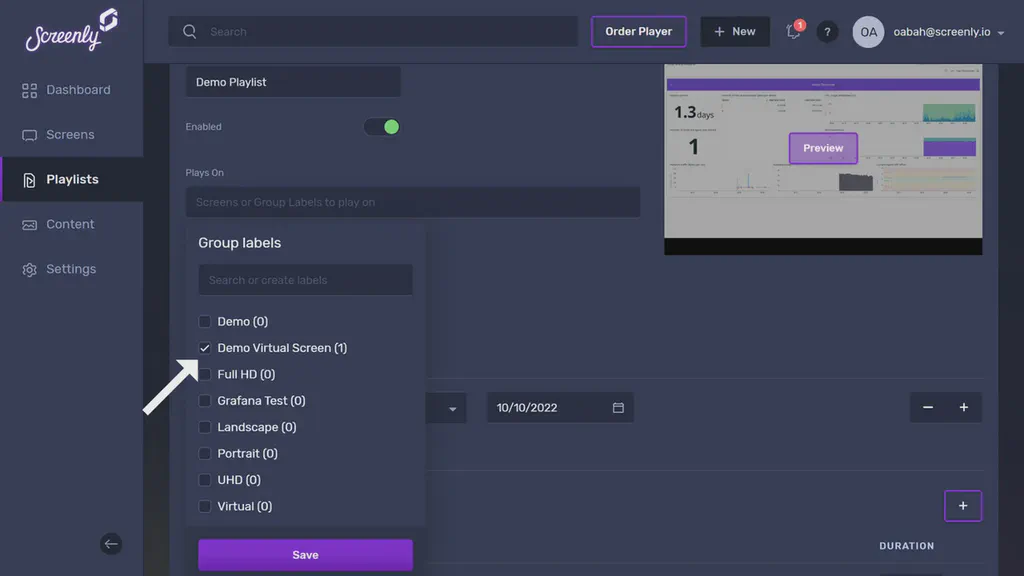
To assign the playlist containing the Tableau dashboard content to a screen, click on the “Plays On” input field in the “Edit Playlist” section.
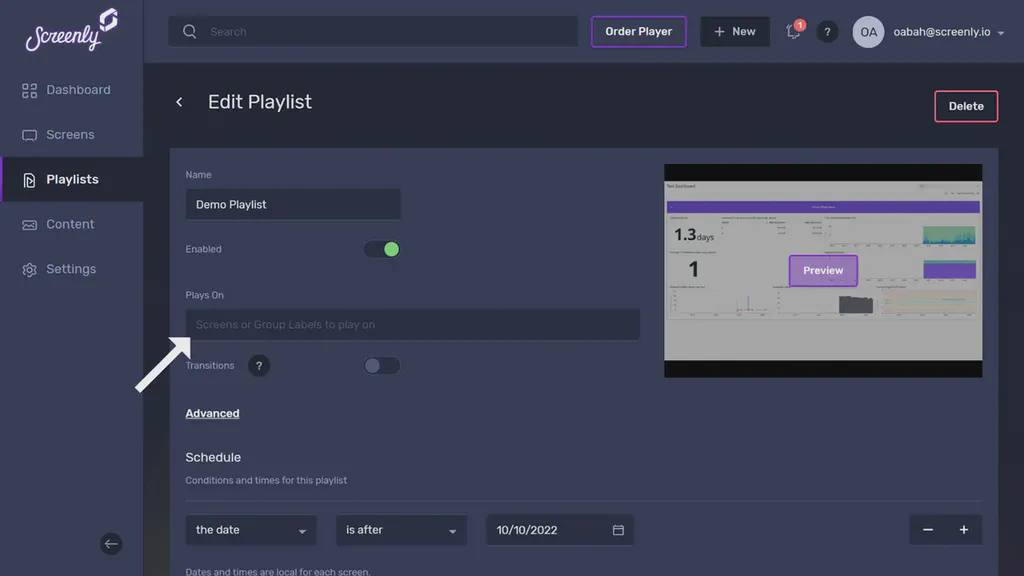
A dropdown menu will appear containing all your screens and group labels, select the screen(s) or group(s) of screens you would like the playlist to show on. Make sure to click “Save” at the bottom of the dropdown after selecting the screen(s) or group(s) of screens you want.
Once you assign the playlist containing the Tableau dashboard content to your screen(s) or group(s) of screens, your Tableau dashboard will display on your TV or monitor in just minutes.
You can then repeat this for all the dashboards that you want to display. You can then simply add each of them as content items within your online Screenly account.
We are here to help
If you have any trouble setting up your Tableau dashboard, let us know at Screenly Support. We are here to help!