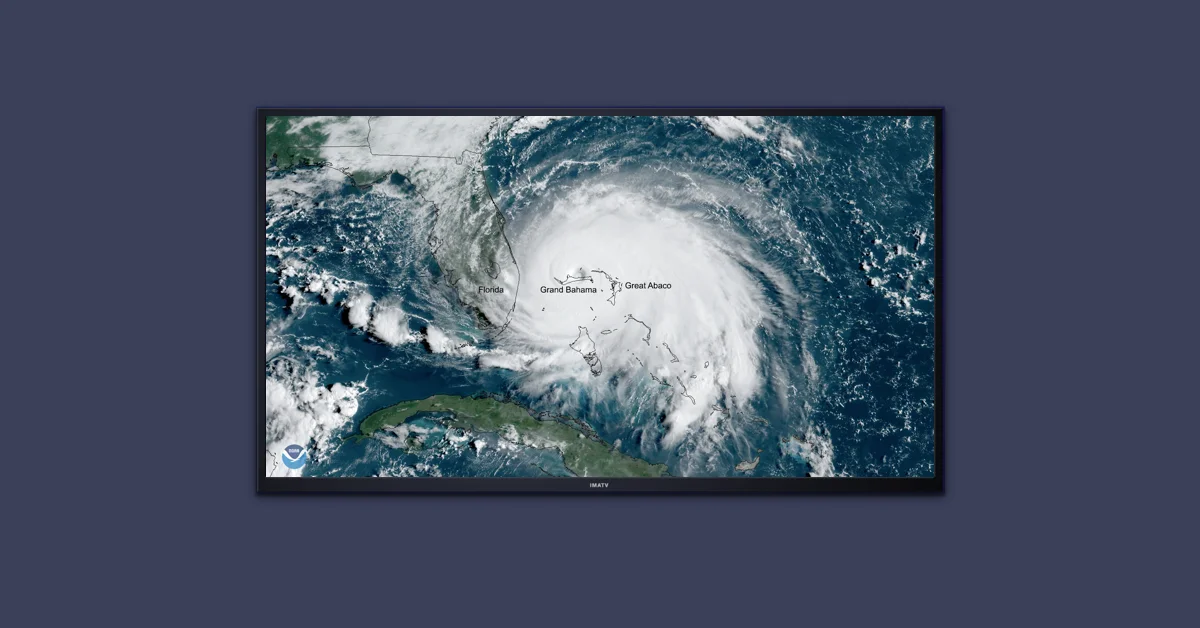

This image is from the NOAA Environmental Visualization Laboratory.
If you’re on the east coast of the U.S., you’ve likely been keeping track of Hurricane Dorian. At the time of this writing, it is a Category 5 storm with sustained winds over 157 mph. For Category 5 storms, the Saffir-Simpson Hurricane Wind Scale states that “catastrophic damage will occur” and “most of the area will be uninhabitable for weeks or months.” [Updated: Hurricane Dorian is currently a Category 3 as of 10:30am EST on Tuesday, September 3rd.] Once, Dorian only threatened the Bahamas and Florida. However, its path has changed, and the storm now poses a risk to the Carolinas as well.
Given the changing nature and unpredictability of this storm, those in its potential path understandably want to keep an eye on its every move. In this article, we’ll show you how to use Raspberry Pi digital signage to stay informed on Hurricane Dorian’s path. With a Raspberry Pi digital sign, users can stay up-to-date on Hurricane Dorian without having to tune into the distracting news cycles on TV.
How to set up a Raspberry Pi digital sign
To get started with a Raspberry Pi digital sign, you will need to enable your Raspberry Pi to render content to a digital screen. This process involves flashing your Raspberry Pi’s SD card with a new disk image. You can download the Screenly disk image for Raspberry Pi digital signage by signing up for a free trial account with Screenly (no credit card required!). Note that Screenly only works with the Raspberry Pi 3 Model B/B+ and the Raspberry Pi CM3, however our open-source version will work with any Raspberry Pi model. If you prefer to work with our open-source edition, see the bottom of this article for more information.
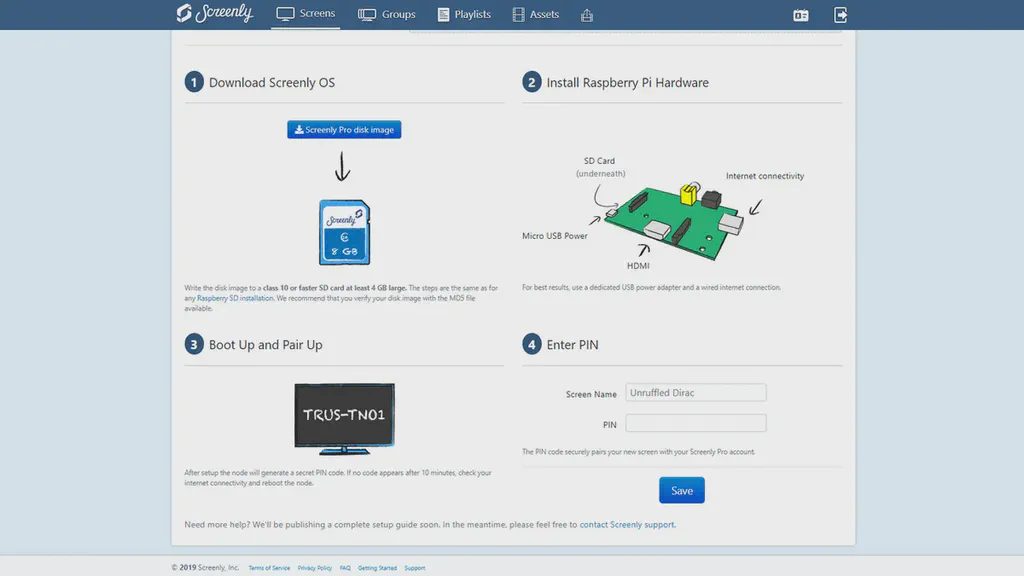
To get started, log in to your Screenly account, and click the “Screens” tab on the top menu bar. Then, on the top right, click the “+ Add Screen” button. There you can find a “Screenly disk image” button. Click it to download the disk image. Once you have the disk image downloaded to your desktop, use a tool like Balena’s Etcher to flash the new disk image to your SD card.
Next, place the newly flashed SD card into your Raspberry Pi and plug it into a power source. Then, connect your Raspberry Pi via HDMI to a digital screen or monitor. Expect the bootup process to take a few minutes. Once your Raspberry Pi is on and displaying the Screenly splash screen, pair your screen with your Screenly account. You can do this by entering the PIN displayed on your screen in the “Step 4” box on the Screenly web interface.
If the setup went smoothly, congratulations! You now have a Raspberry Pi digital sign. If you had any trouble, check out our more detailed video on how to install Screenly on your Raspberry Pi.
Adding Hurricane Dorian content feeds to your digital sign
Once you successfully pair your screen with your online account, you will need to add Hurricane Dorian content feeds to your digital sign. To do this, you will need to add URL links to your Screenly digital signage account and display live webpages on your screen.
One of the best sites for monitoring hurricane activity is Cyclocane. The website compiles great weather and prediction data from a variety of sources and displays it in a clutter-free, intuitive layout. Check out their Hurricane Dorian storm tracker for the latest details on the storm.
Next, depending on what Hurricane Dorian content you want to display, check out the links below.
To add land hazard updates and a live spaghetti-model map, use this URL:
https://www.cyclocane.com/dorian-storm-tracker/#section_0
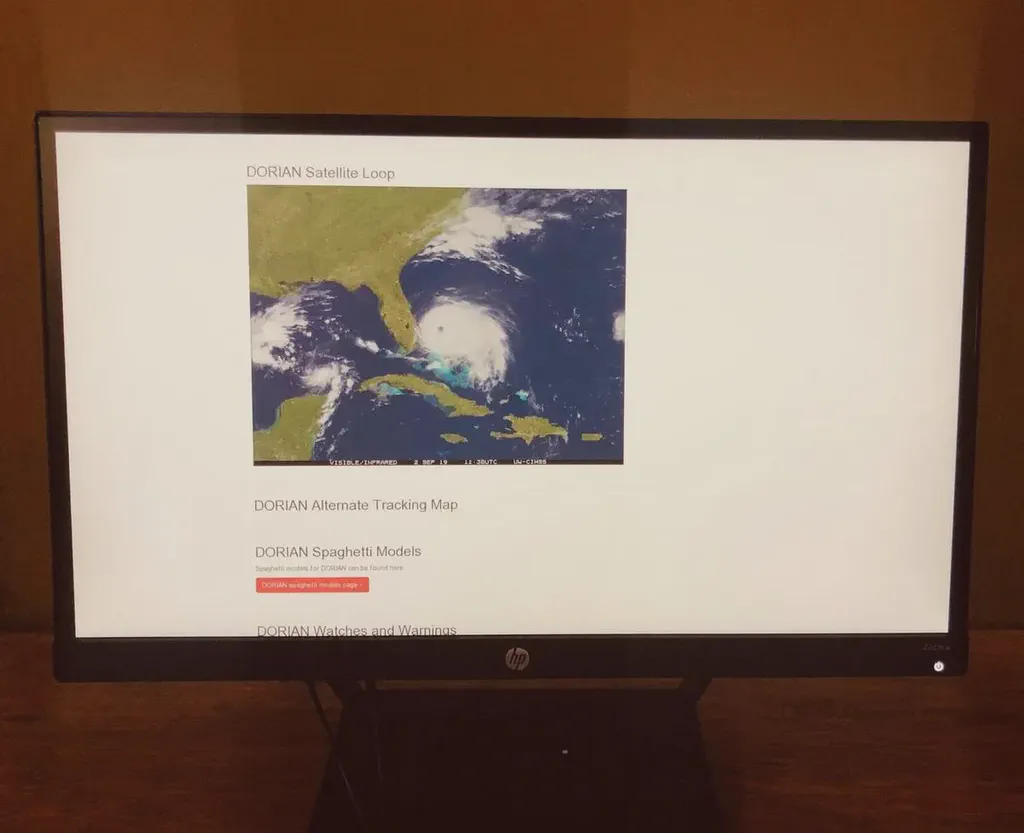
To add a satellite loop (this looks amazing), use this URL:
https://www.cyclocane.com/dorian-storm-tracker/#section_2
To add watches, warnings, and time estimate data, use this URL:
https://www.cyclocane.com/dorian-storm-tracker/#section_5
To add these web pages to your digital sign, navigate to the “Assets” page on the Screenly web interface. Next, click the “+ Add Asset” button and select the “URL” option to add each URL. Then, add each URL one-by-one and be sure to click “Save.”
With the URLs added to your Screenly account, the next step is to add these URLs to a playlist. To do so, click on the “Playlists” tab on the top menu. Then, click the “+ New Playlist” button. Name the playlist “Hurricane Dorian,” and select the name of your recently added screen. Next, click the “+ Add” button to add each URL to the playlist. To finish up, click “Save” to add each URL to the playlist.
After a few moments, you should then see the added Hurricane Dorian content on your Raspberry Pi digital sign! If you have any trouble adding content to you Raspberry Pi digital sign, check out our detailed YouTube video on the topic here.
Stay safe out there
Now that you have a Raspberry Pi digital sign with several Hurricane Dorian content feeds, you should be well aware of the storm’s every move. Remember that mother nature is powerful and unforgiving, so be sure to abide by any evacuation orders for your area. Also, be sure to follow any recommendations from local emergency services, such as having enough water for a few days. Stay safe!
If you have any trouble setting up your Raspberry Pi digital sign, don’t hesitate to reach out to Screenly Support.
– Note that we do have an open-source edition of Screenly called Screenly OSE. If you prefer to work with our open-source software, check out our page on Screenly OSE to learn more about getting started. Note that this article references the paid version of Screenly, which has a 14-day free trial with no credit card required.