ClickUp is a popular all-in-one project management platform used by teams of all sizes to track tasks, timelines, goals, and collaboration. With its robust dashboards and flexible views, ClickUp makes it easy to manage complex projects in one place.
Now, with Screenly, you can display your ClickUp dashboards on digital signage — whether in your office, warehouse, or remote workspace — so your team can stay aligned and on track.
Here’s how to set it up.
Step 1: Get started with Screenly
If you don’t already have a Screenly account, you can start a free 14-day trial with no credit card required. If you already have an account, log in and head to your Screenly dashboard.
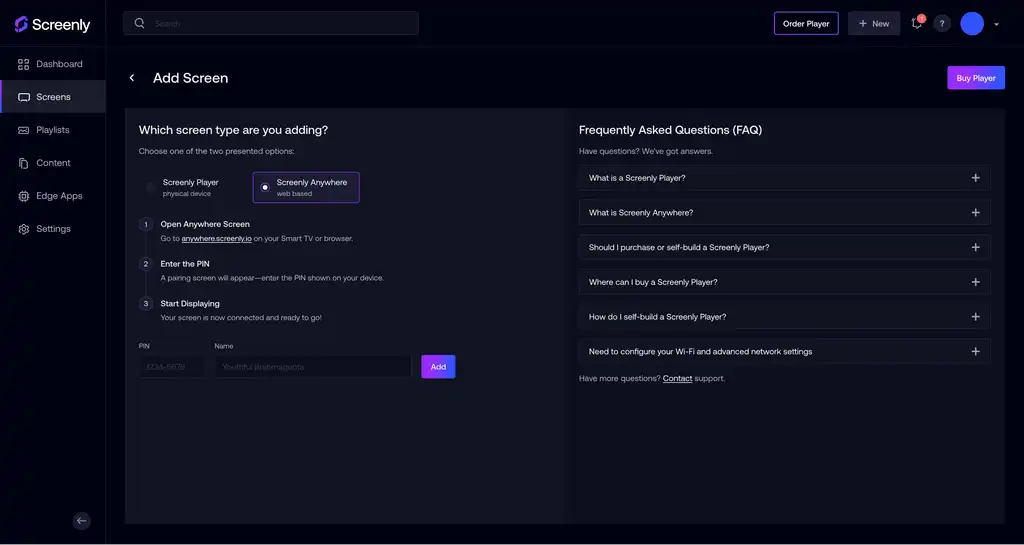
To add a screen:
-
Click the Screens tab on the left-hand menu
-
Click + Add Screen in the top right
In this walkthrough, we’re using a Screenly Anywhere screen, which allows you to launch a digital sign using just a web browser — no additional hardware needed. Just go to anywhere.screenly.io, and pair the screen using the code shown.
Give your screen a name like Test Screen and click Add.
Step 2: Get your public ClickUp dashboard link
Next, open the ClickUp project or dashboard you want to display.
- Navigate to the list or view you want to share.
- In the top-right corner, click Share.
- Scroll down and click Share this view.
- In the top-right corner, click Share.
- Scroll down and click Share this view.
- Make sure the visibility is set to “Anyone with the link can view.”
- Click Copy Public Link.
This public link will be used to pull your ClickUp data into Screenly.
Step 3: Add your ClickUp board to Screenly
In the Screenly dashboard, click the Content tab on the left-hand menu.
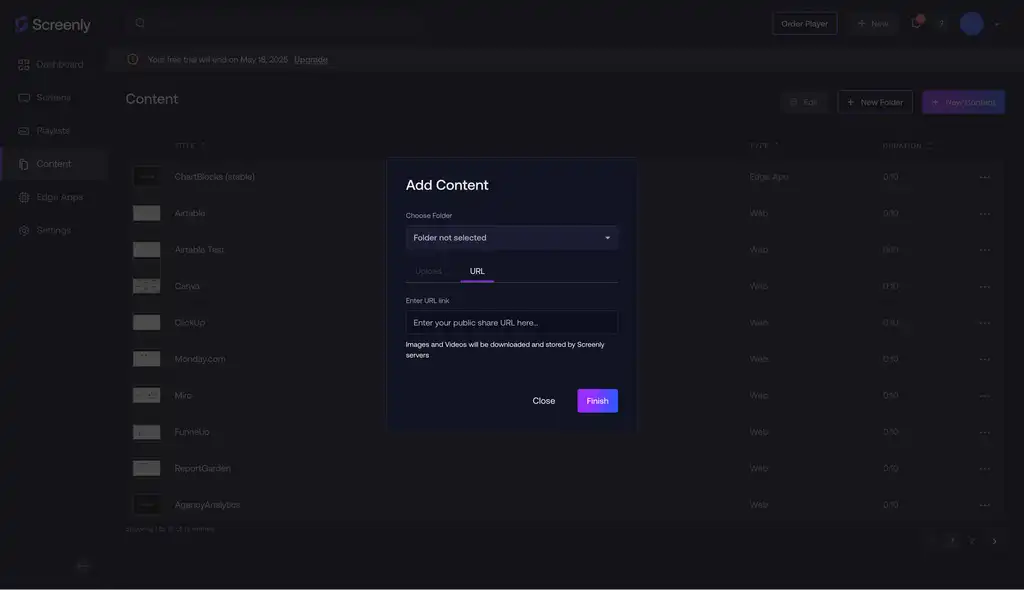
- Click + New Content in the top right.
- In the popup modal, select URL.
- Paste in your ClickUp public link and click Finish.
- Give the content a name like ClickUp Dashboard and click Save.
Your ClickUp content is now ready in your content library.
Step 4: Create a playlist and assign it to your screen
Use the following steps to create a playlist and assign it to your screen:
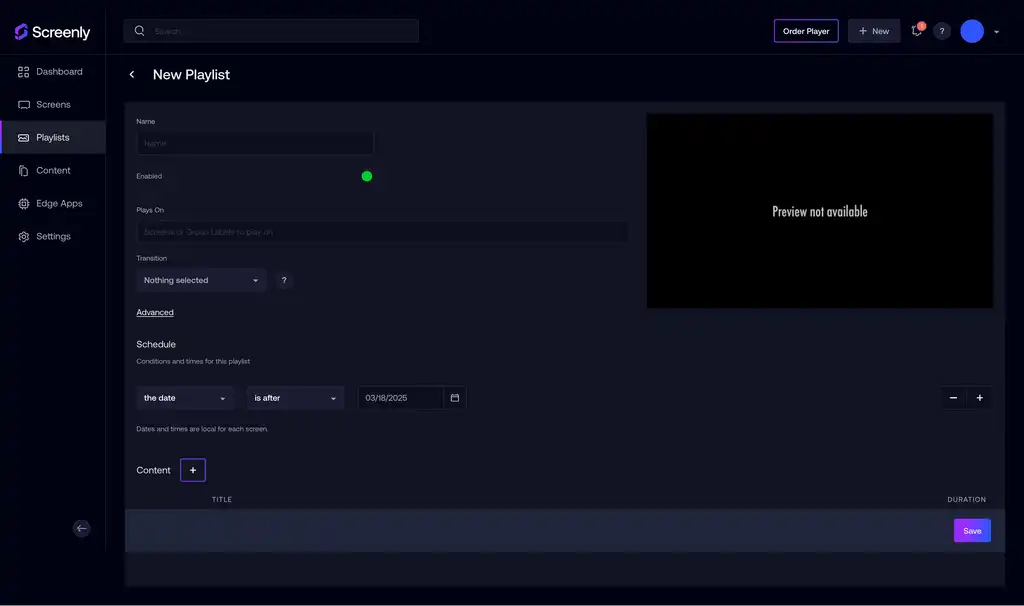
- Click the Playlists tab on the left-hand menu.
- Click + New Playlist on the top right.
- Click + New Playlist on the top right.
- Name the playlist something like “Project Management”.
- Under Content, add the ClickUp item you just created.
- Set the schedule so the playlist starts immediately (or whenever you need).
- Under Plays On, select the screen you paired earlier (e.g., Test Screen).
- Optionally, adjust the display duration to something like 30 seconds for looping.
- Click Save.
Your playlist is now set up and linked to your screen.
Step 5: That’s it!
Your ClickUp dashboard will now display on your Screenly screen. It’s a simple way to keep your team updated, visualize project progress, and stay on top of key deadlines — all in real time.
Get started with Screenly & ClickUp
It’s easy to get up and running with Screenly and ClickUp. Just sign up for a free trial, share your favorite ClickUp dashboards, and turn any screen into a real-time project tracker — no extra hardware required.
Have questions? We’re always happy to help.
