New Relic is most famous for its application performance monitoring (APM) tool, which provides users with insights into how their applications are performing and where bottlenecks are located. In addition to their APM tool, New Relic also offers a great server and network monitoring tool.
With the wealth of data, New Relic provides a great overview of how your service is performing. Users can display this performance data on a digital signage dashboard.
To display New Relic data on a digital sign, you can use Screenly digital signage software. The first step is to get the public links for the New Relic charts you wish to share. Next, you will add those public links as a content item within your online Screenly account.
Steps for getting New Relic chart link
To display your New Relic chart on your digital sign, you will need to get the link for the chart you wish like to display. You can do this by following the steps below:
First, log in to your New Relic account.
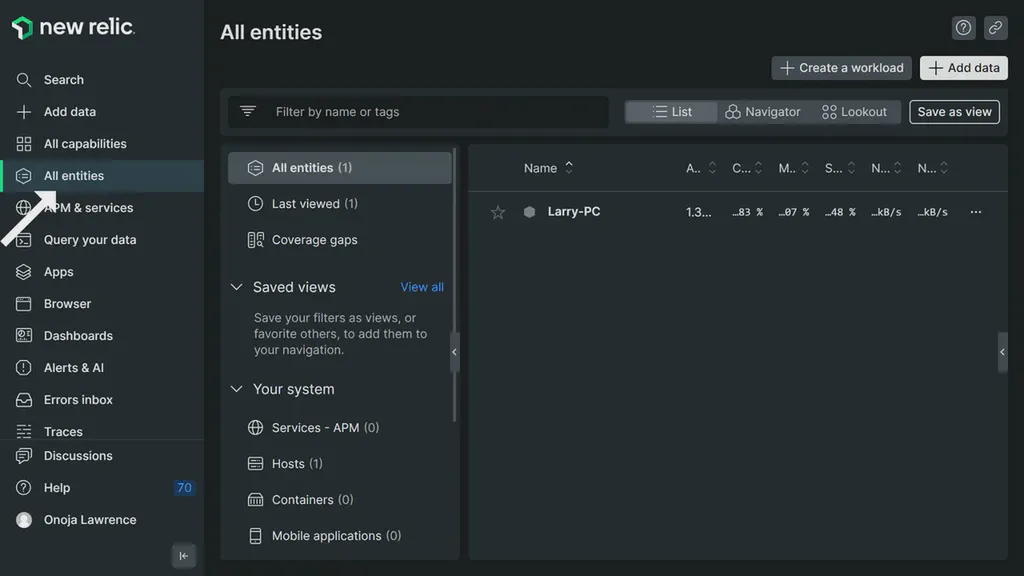
After logging in to your New Relic account, view the side-menu navigation and click on “All entities” to view all your New Relic data sources.
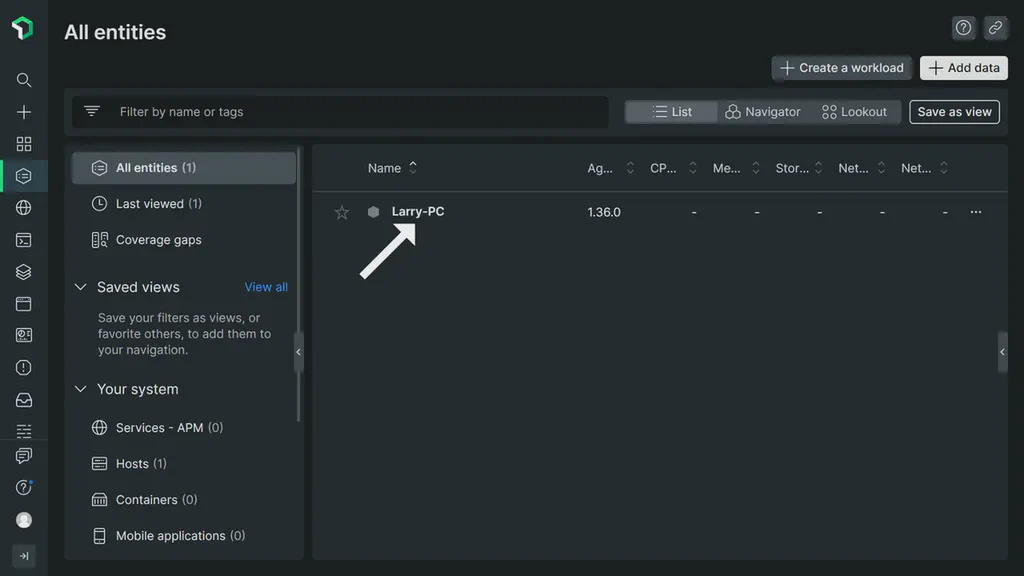
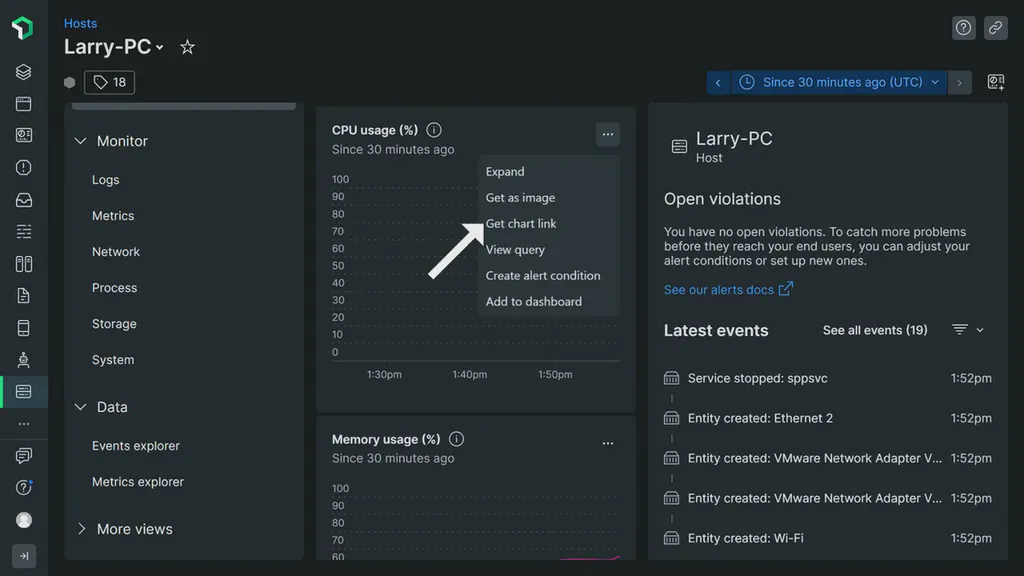
From the “All entities” page, click on the entity you would like to get a chart from.
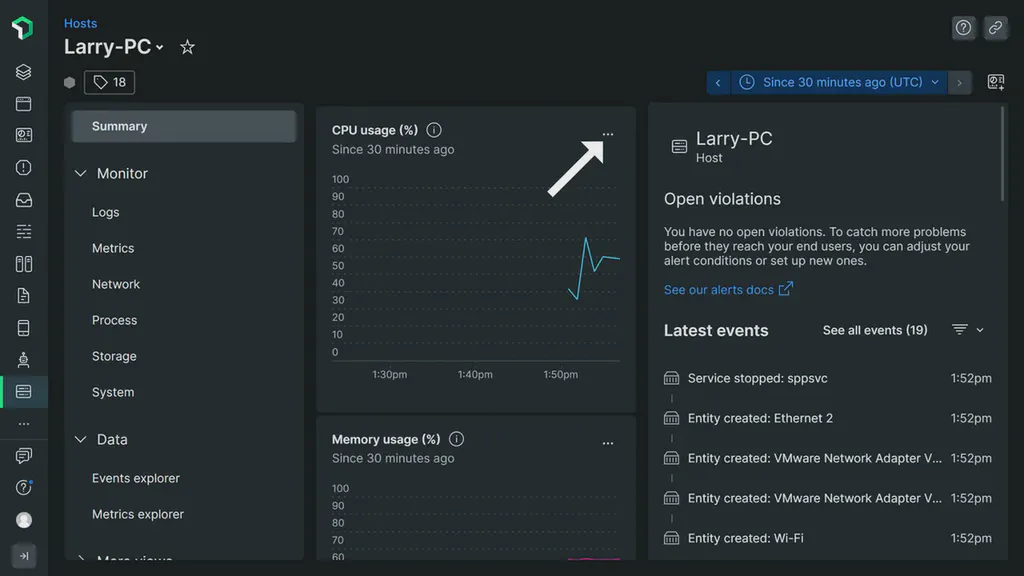
The next step is to identify the chart from the list of data charts available that you would like to display on your digital sign. After identifying and selecting the chart, click on the three dots at the top-right corner of the chart to get a pop-up menu for that chart.
From the pop-up menu for the chart, click on “Get chart link” to get a URL for the chart. Copy this URL, as this is the URL that you will add as a content item within your Screenly account.
Setting up your digital sign
Now that you have your public URL, the next step is to set up your digital sign. The first step for creating a digital sign is to purchase a digital signage player. A digital signage player is a small physical device that renders content to your TV or monitor - Screenly offers the Screenly Player and Screenly Player Max. You can then pair your digital signage player and associated screen to your online Screenly account.
The next step for displaying your New Relic chart on your digital sign is adding the public URL for the chart to your online Screenly account. To do so, follow the steps below.
Log in to your online Screenly account here. If you do not have a Screenly account, register for a 14-day free trial.
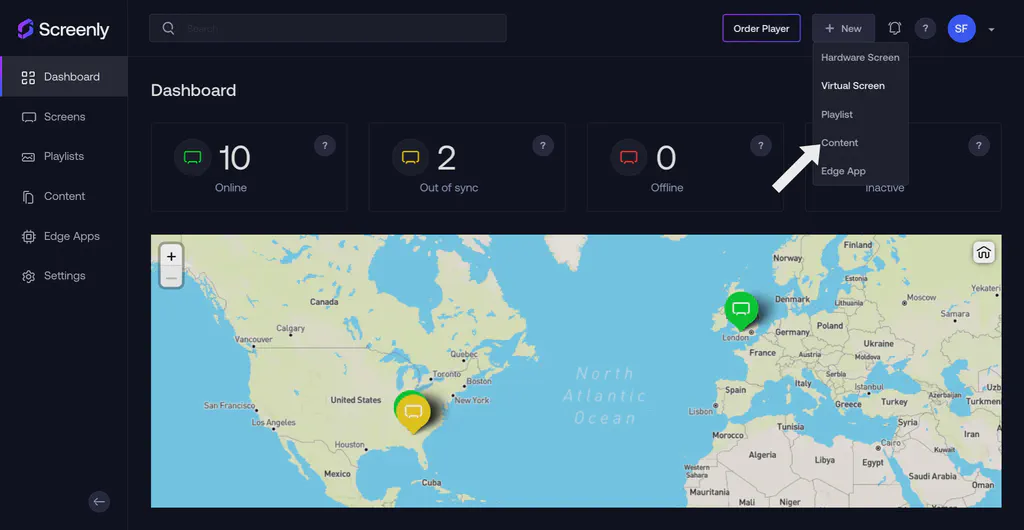
After logging in to your Screenly account, click on the “New” button on the top right of your screen. Then, click on the “Content” tab in the dropdown menu.
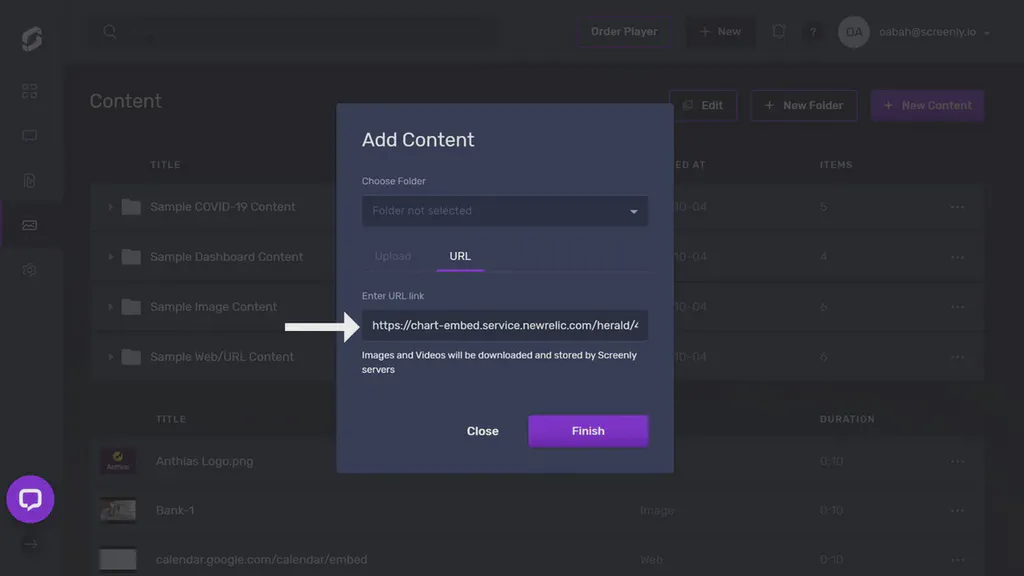
Next, click the URL tab in the popup modal and paste the public URL into the “Enter URL link” input field. Edit the URL by changing the “height” variable to 1020px. This edit gives a better viewing experience as it will be better suited to the resolution (1920x1080) that we will be using. Be sure to click “Finish” on the bottom right after you successfully add the URL.
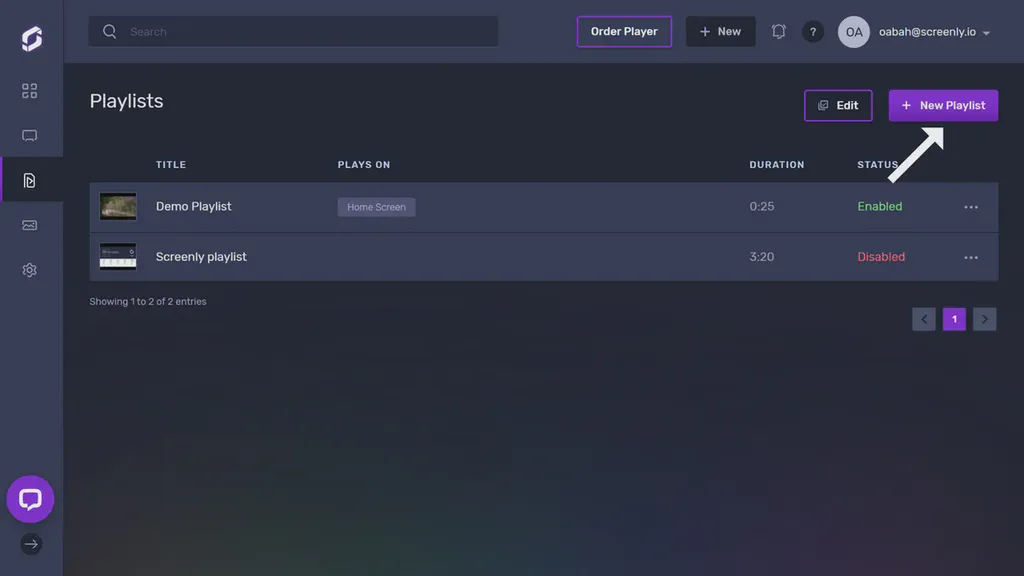
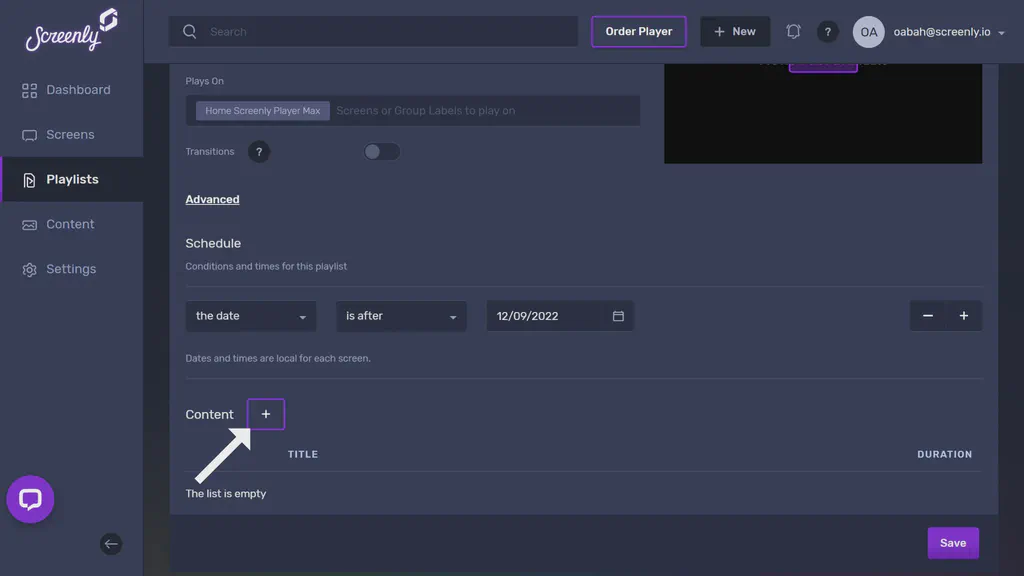
With the above steps completed, you can now add this asset to a playlist. To add your content to a playlist, click the “Playlist” tab from the left-hand menu. If you wish to add a new playlist, click the “+ New Playlist” button on the top right of the new screen that loads. To edit the new playlist or a previously existing playlist, click on the name of the playlist you wish to edit from the list of playlists.
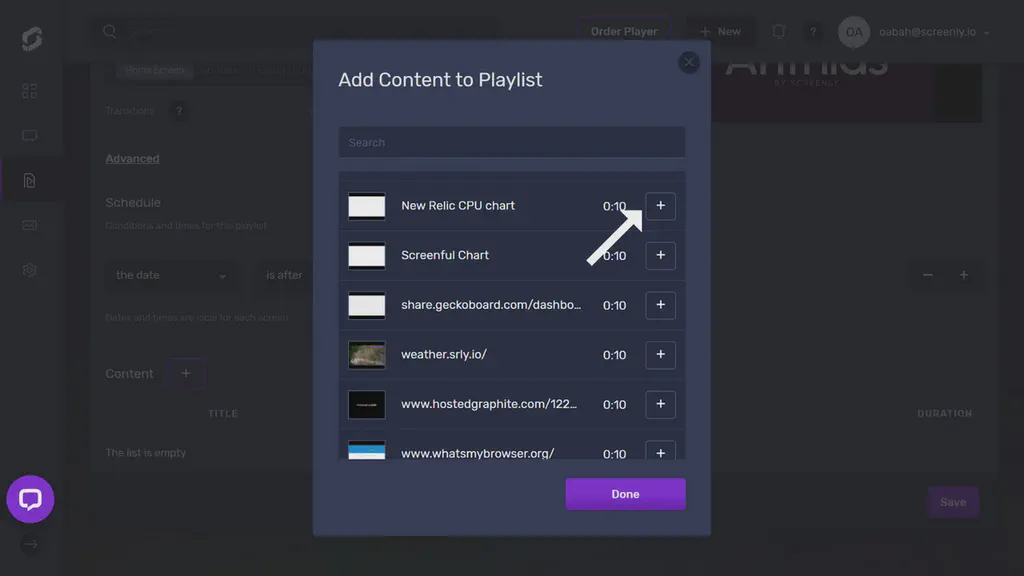
Within the playlist, click the “+” icon in the Content section. From there, you will see a popup that will allow you to add the New Relic chart to the playlist from your content collection.
In the new “Add Content to Playlist” popup, find your New Relic chart content and click the “+” button next to the file. Then, click the “Done” button below.
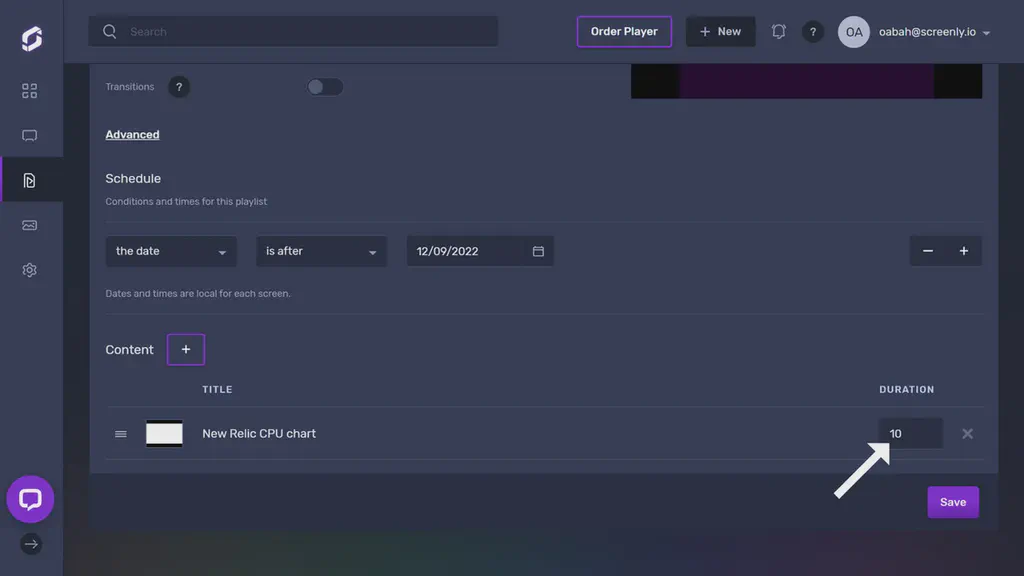
You will then see your New Relic chart in the playlist’s content section. Next to the chart content listing, change the listing’s duration to the time you want the chart display on your screen. Be sure to click “Save” on the bottom right.
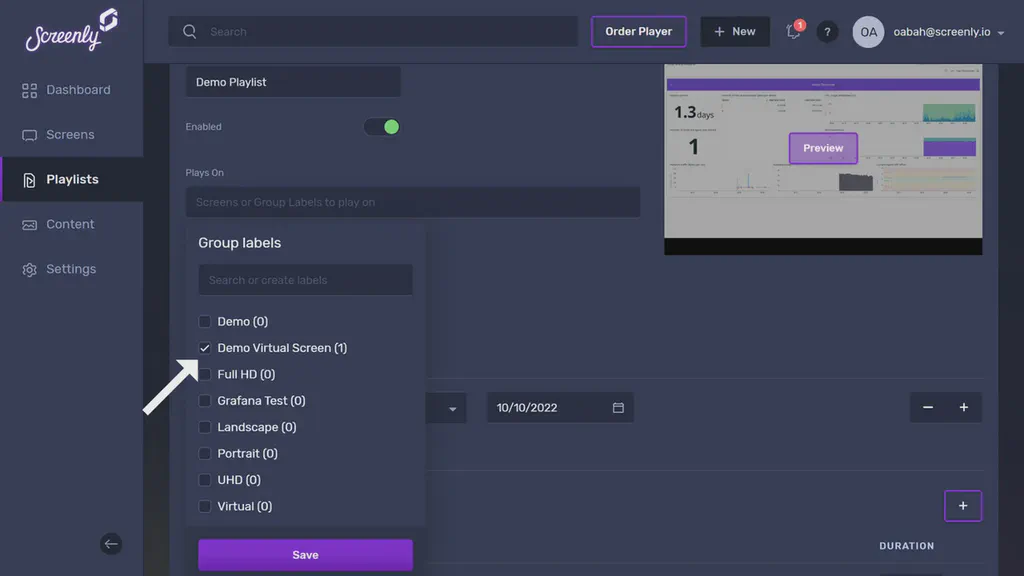
To assign the playlist containing the New Relic chart content to a screen, click on the “Plays On” input field in the “Edit Playlist” section.
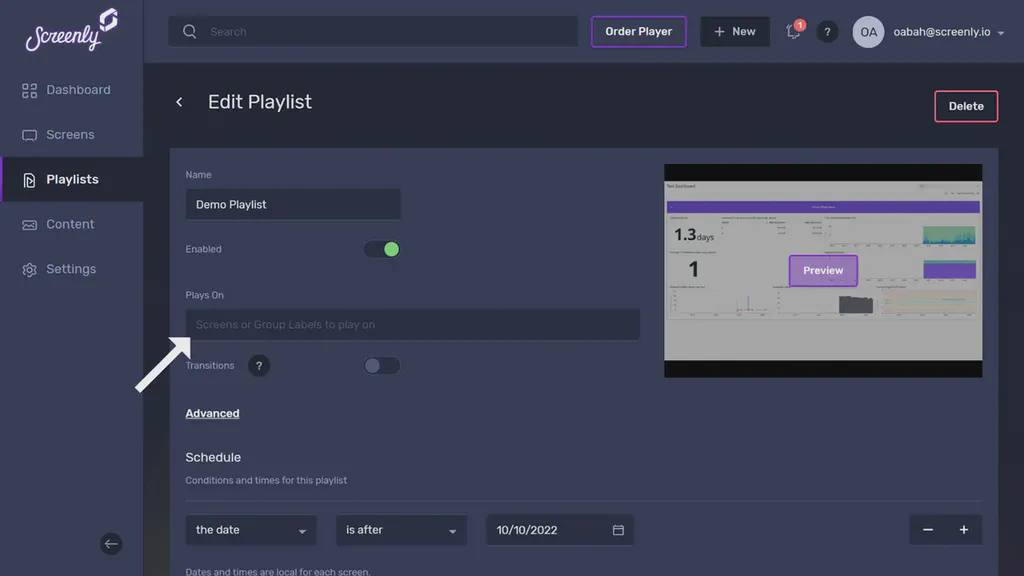
A dropdown menu will appear containing all your screens and group labels, select the screen(s) or group(s) of screens you would like the playlist to show on. Make sure to click “Save” at the bottom of the dropdown after selecting the screen(s) or group(s) of screens you want.
Once you assign the playlist containing the New Relic chart content to your screen(s) or group(s) of screens, your New Relic chart will display on your TV or monitor in just minutes.
You can then repeat the above steps for all the New Relic charts that you want to display. You can then simply add each of them as content items within your online Screenly account.
Get started
Ready to give Screenly a shot? Sign up for Screenly with a 14-day free trial.