Screenly offers SAML support with Okta. Screenly also supports SAML with Auth0, which you can learn more about here, and Azure, which can you find here.
SAML stands for “Security Assertion Markup Language” and allows users to transfer identity information between an identity provider (IdP) and a service provider (SP).
Please see below for more information on how to configure Screenly to work with SAML.
Metadata Location
If this is needed, here are the steps to find your metadata:
Login to your Screenly account (only the account owner can complete this).
Take the first part of the URL showing in your browser - e.g. https://YOUR-DOMAIN-HERE.screenlyapp.com/
Then append “sso/saml_metadata_view” to the end of it - e.g. https://YOUR-DOMAIN-HERE.screenlyapp.com/sso/saml_metadata_view
An example from a test account would look like: https://screenly-testing-inc.screenlyapp.com/sso/saml_metadata_view
This will then bring up a page with your metadata.
Step by step set up for Okta SAML authentication
Step 1 — Register at okta.com and navigate to the admin dashboard.
Step 2 — Add the SAML application to your Okta account. To do so, click Applications in the sidebar, then click Create App Integration. Next, select Web from the Platform dropdown menu. Then, select SAML 2.0 and click Create.

Step 3 — The next task is to set your SAML configuration. For the Single sign on URL field, please enter:
https://login.screenlyapp.com/sso/complete/saml/?idp={domain}
For the Audience URL (SP Entity ID) field, please enter login.screenlyapp.com
You can select Unspecified from the Name ID format drop-down menu.
Step 4 — Next, you must set the application’s attribute statements.
- For the first attribute, enter
namewith the valueuser.login. - For the second attribute, enter
emailwith the valueuser.email. - You can leave the Name format field for each attribute as Unspecified.

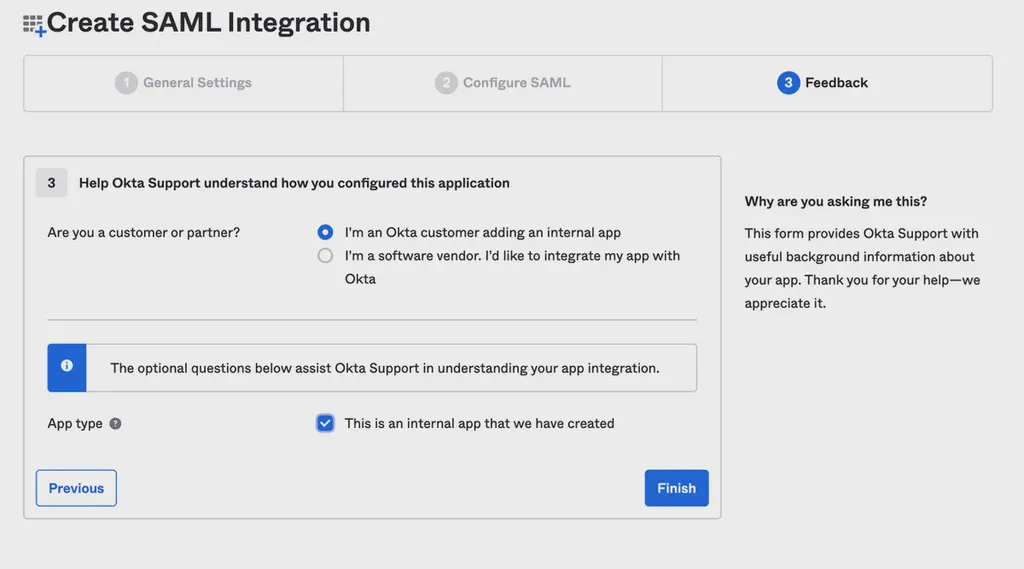
Step 5 — On the next page, users must select the “I’m an Okta customer” adding an internal app option.
Step 6 — After creating the Okta app, users must navigate to the Sign On tab in the app settings section and click View Setup Instructions.
Next, copy the Identity Provider Single Sign-On URL, the Identity Provider Issuer, and the X.509 Certificate to the SAML single sign-on configuration menu within your online Screenly account (Screenly → Settings → Team).
Step 7 — Assign your new Okta app to users within your Okta account.
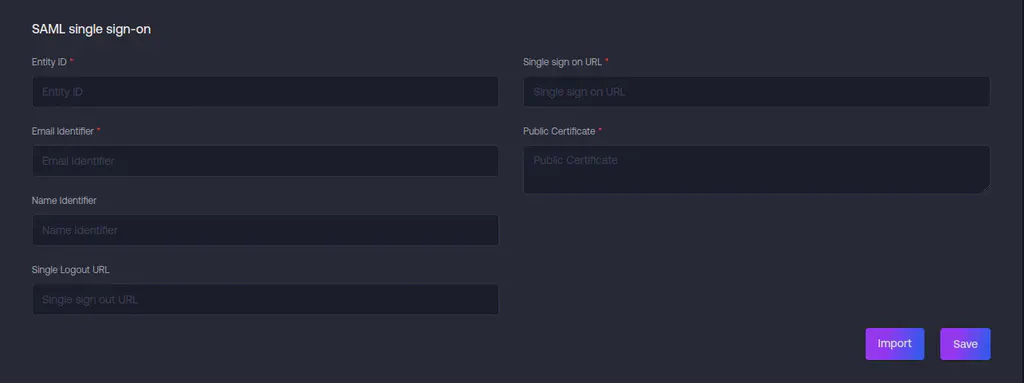
Paste the Identity Provider Issuer in the Entity ID field. Paste the Identity Provider Single Sign-On URL in the Single sign-on URL field. Paste the X.509 Certificate in the Public Certificate field without BEGIN and END certificate lines.
Step 8 — Log into your Screenly account, and go to the SAML section found in Settings → Teams.
Step 9 — Import your file from step 6 to fill in the configuration fields.
Step 10 — Save the configuration, and now SAML should be configured. You can test this by clicking the ‘Copy URL’ button below the SAML settings in Screenly, logging out of Screenly, then pasting the URL into the browser to login.
Step 11 — Return Back to Okta console on Sign On section and fill in RelayState(this field is required if you want to use IdP-initiated flow). RelayState equals hash that takes from the Screenly SAML URL login (/sso/login/saml?idp=HASH).
That completes the setup.
What is the user authorization process with SAML?

First, the owner sends the SAML login url. This is necessary to invite a new user.
Next, the user redirects to the IdP authorization screen.
The next step is for the user to complete authorization. When the user completes IdP authorization, the IdP redirects the user back to Screenly with the IdP’s response.
The user can then register as a new user or, if the user already exists, the user can merge his or her account. This process is the same registration process as SSO.
That’s all for now!