
Digital signs are meant to be seen. This reality means that when screens have issues and display incorrect content, error messages, or not content at all, these mistakes are highly visible to customers and employees.
The teams that run a company’s digital signs need to quickly identify screens that require troubleshooting so that they can address the problem as quickly as possible. With PagerDuty, teams can more easily delegate around-the-clock monitoring and alerts among employees.
In the post below, we cover how users can setup PagerDuty to work with their Screenly digital signs and online Screenly account.
Setting up PagerDuty for Screenly
Using the OAuth Integration
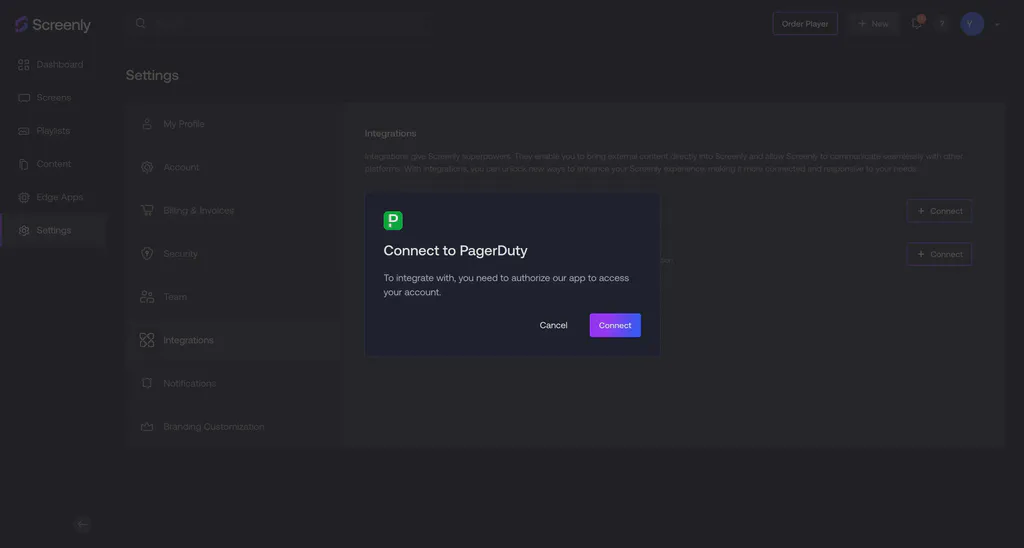
The simplest way to set up PagerDuty with Screenly is by using OAuth.
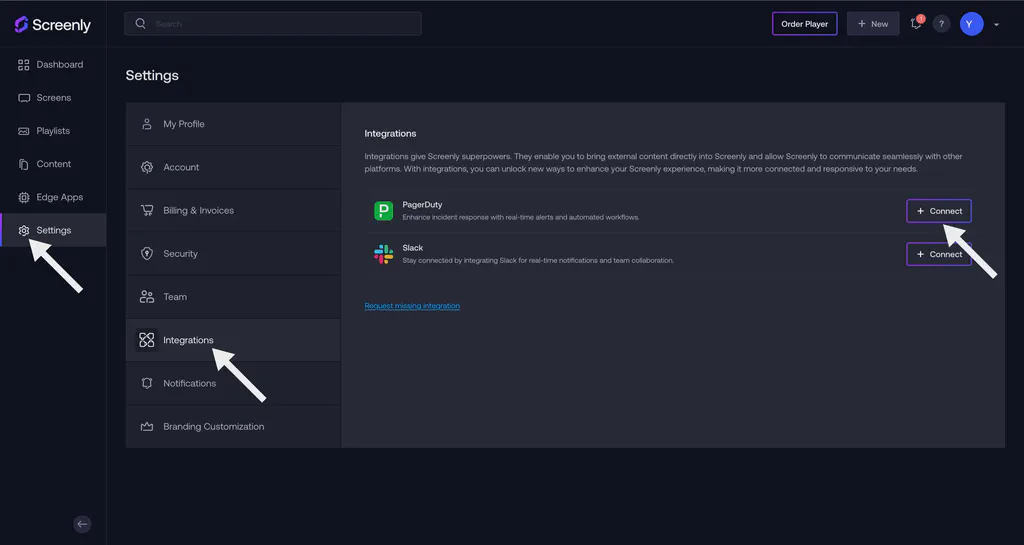
Go to the Settings tab in your Screenly account and follow these steps to set up PagerDuty using the OAuth.
Click on the “Integrations” tab from the left-hand menu.
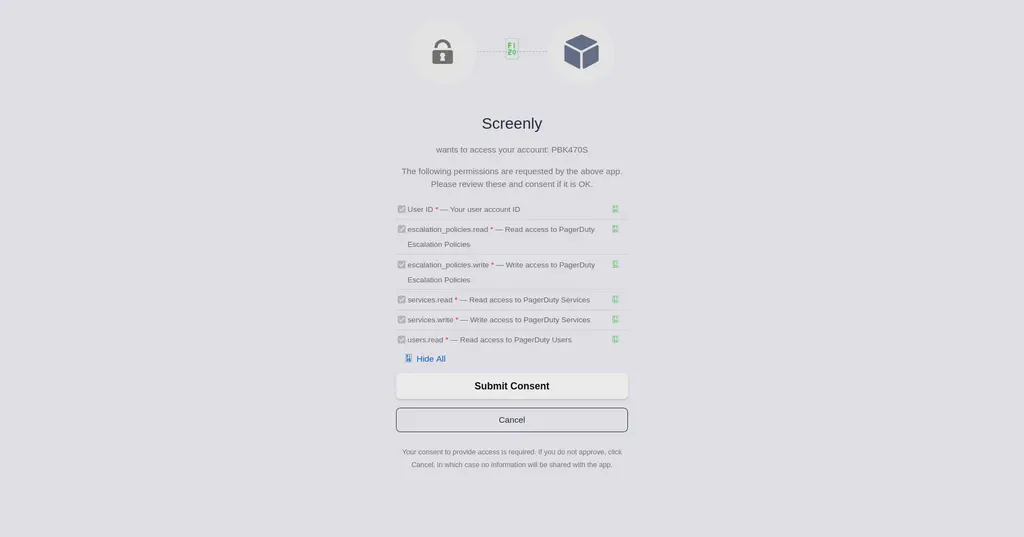
That’s it! Your PagerDuty integration using OAuth is now set up.
Manual Setup
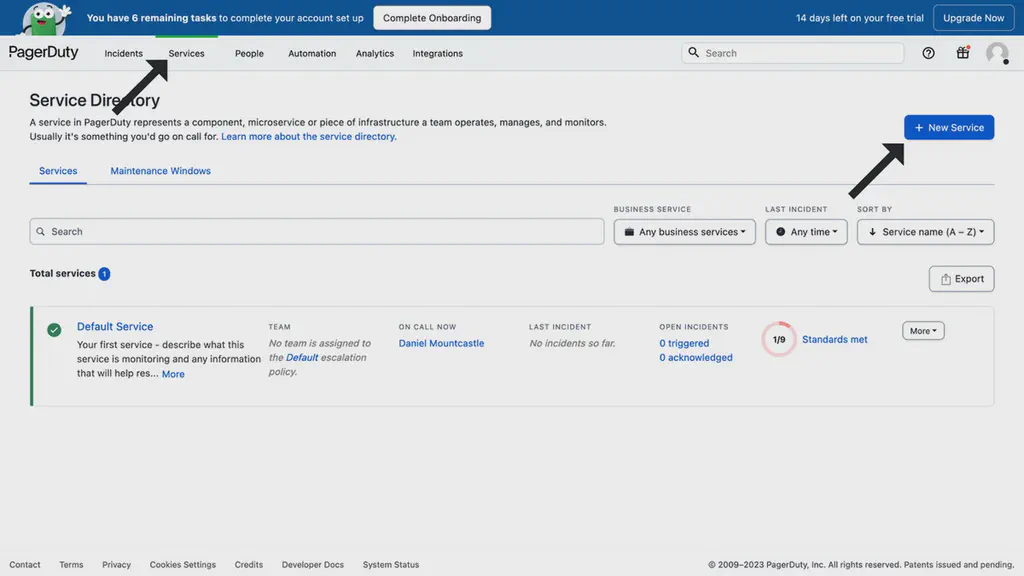
The first step is to create a PagerDuty account. Within your PagerDuty account, click the “Services” tab on the header menu. Next, click the blue “+ New Service” button on the top right.
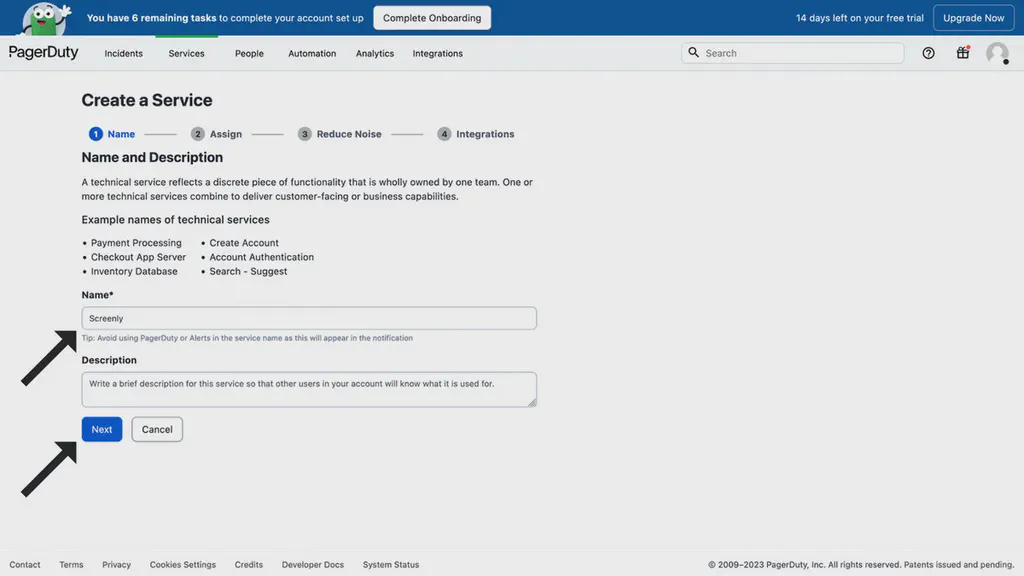
Enter a name for your service in the “Name” field. You can enter “Screenly” or a custom name of your choice. Then, click the blue “Next” button.
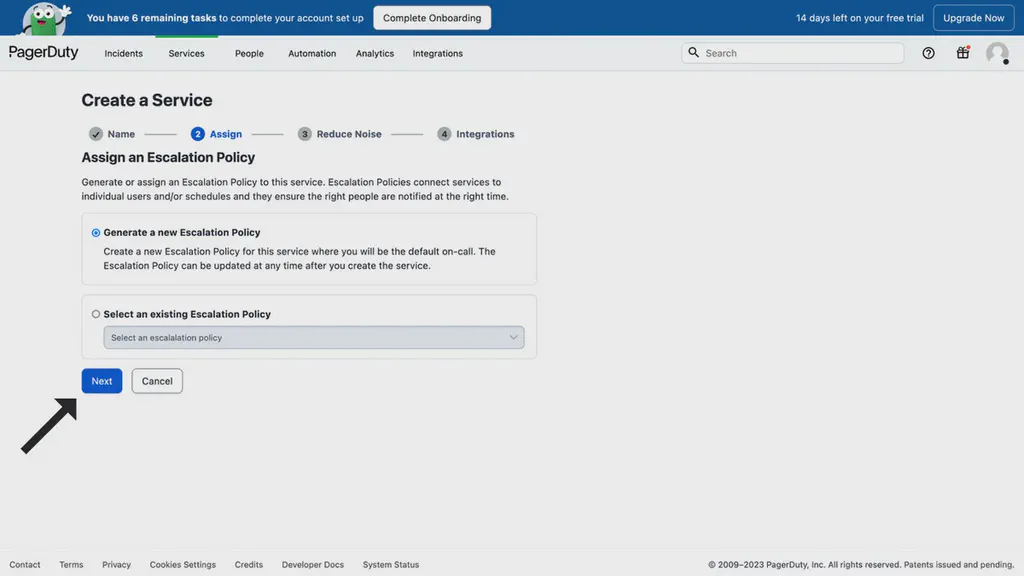
For the “Assign” stage, you can click “Next” with the automatically selected settings. If you have a particular escalation policy that you would like to set, you can do that now.
In the following “Reduce Noise” stage, you can also use the automatically selected settings or choose your own. Click the blue “Next” button at the bottom of the screen.
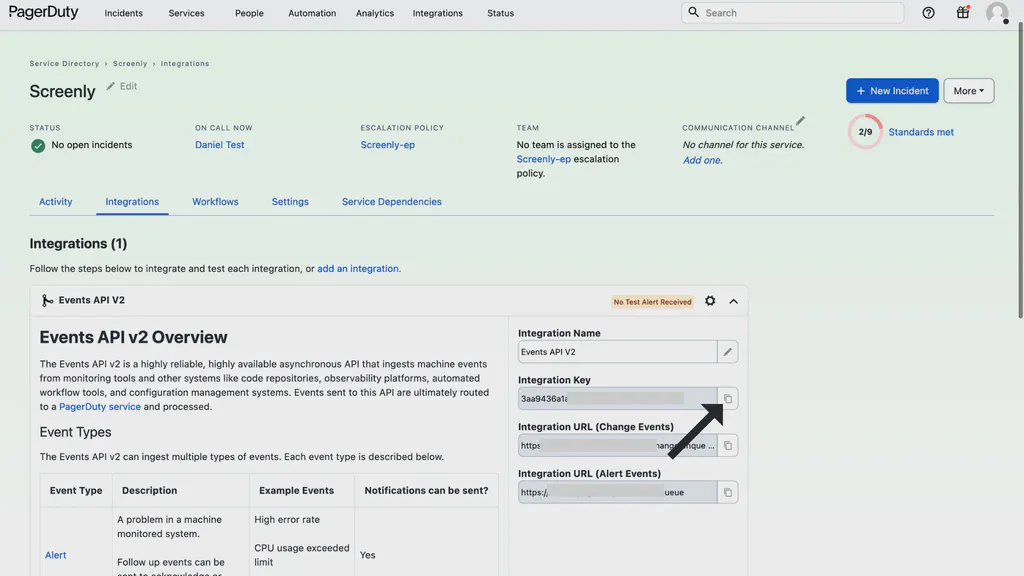
In the “integrations” stage, select the “Events API V2” integration. If it is not visible immediately, search for it in the search box. Once you have the integration selected, click the blue “Create Service” button.

In the next screen that loads, copy the integration key on the right side of the screen. Once you have the integration key copied on to your clipboard, log in to your online Screenly account. If you do not have a Screenly Account, you can register for a 14-day free trial.
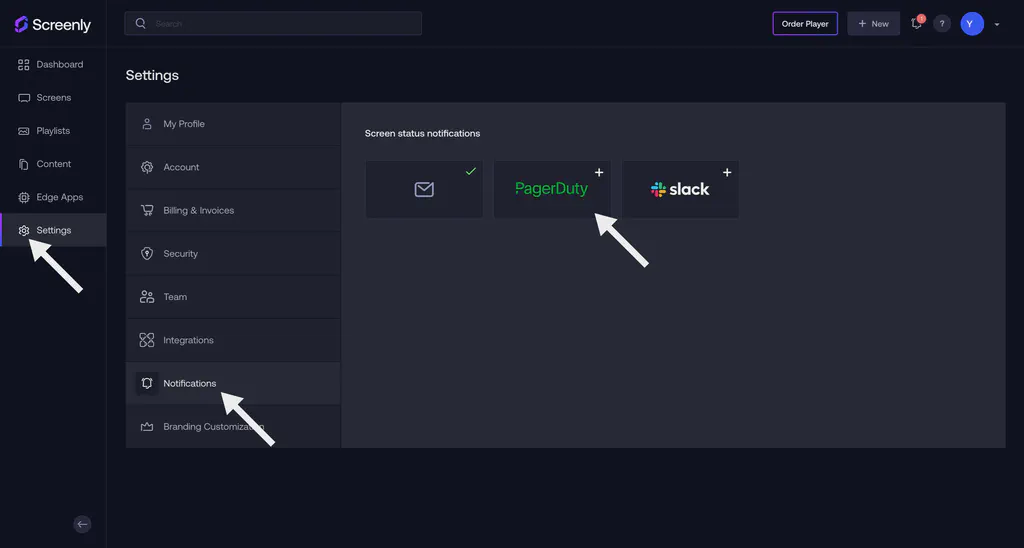
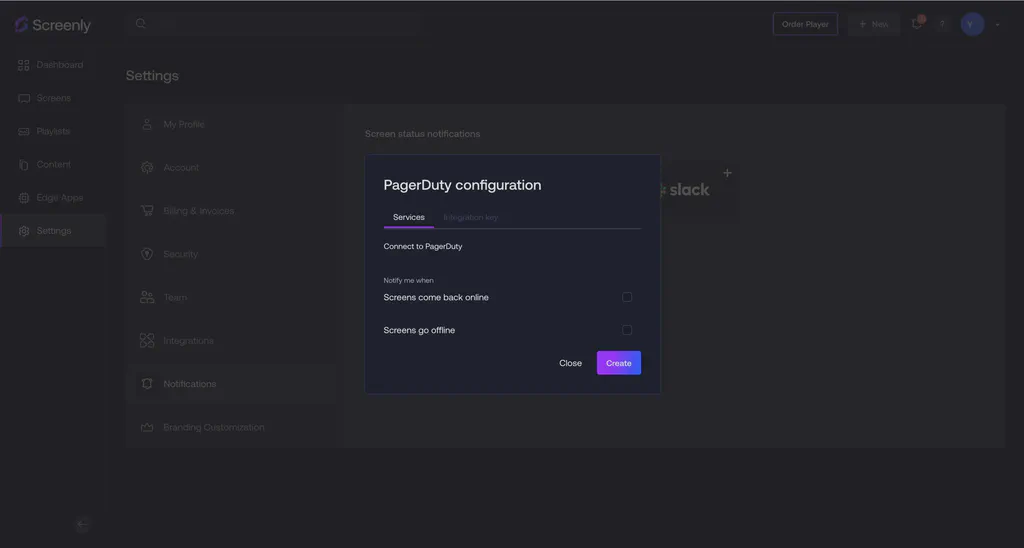
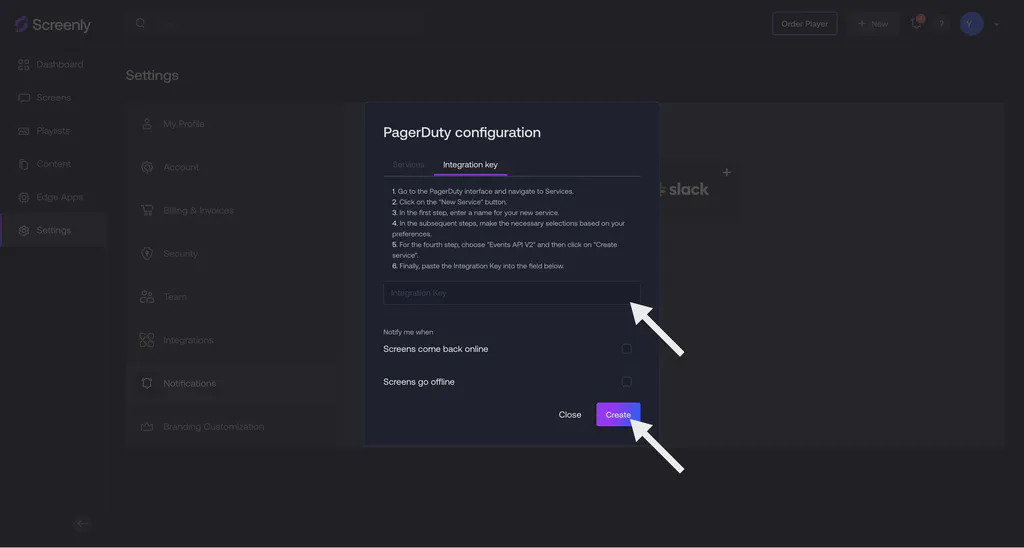
Within your Screenly account, click the “Settings” tab from the left-hand menu. In the new page that loads, click the “Notifications” tab. Then, click on the PagerDuty icon.
In the popup modal that loads, paste the integration key that you have copied to your clipboard. You can then select the cases where you want to receive notifications via PagerDuty. You can receive notifications for when your screens go offline and when your screens come back online. Once you have made your selection, click the purple “Create” button on the bottom right of the popup modal.
That’s it! If you have any questions, reach out to Screenly Support anytime. We are always happy to help.