Screenly offers SAML support with Auth0. Screenly also supports SAML with Okta, which you can learn more about here, and Azure, which can you find here.
SAML stands for “Security Assertion Markup Language” and allows users to transfer identity information between an identity provider (IdP) and a service provider (SP).
Please see below for more information on how to configure Screenly to work with SAML.
Metadata Location
If this is needed, here are the steps to find your metadata:
Login to your Screenly account (only the account owner can complete this).
Take the first part of the URL showing in your browser - e.g. https://YOUR-DOMAIN-HERE.screenlyapp.com/
Then append “sso/saml_metadata_view” to the end of it - e.g. https://YOUR-DOMAIN-HERE.screenlyapp.com/sso/saml_metadata_view
An example from a test account would look like: https://screenly-testing-inc.screenlyapp.com/sso/saml_metadata_view
This will then bring up a page with your metadata.
Step by step example for Auth0
Please see the steps for using Auth0 below.
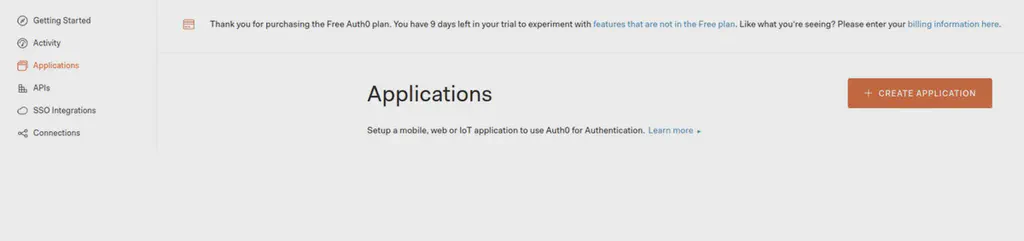
Step 1 — Register at Auth0
Step 2 — Create a new web application
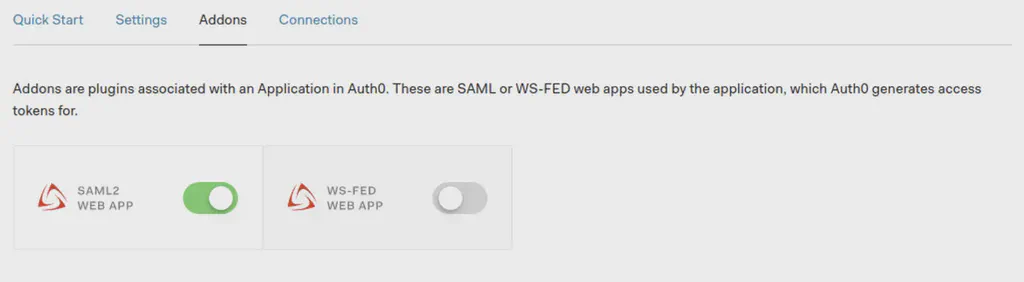
Step 3 — Open SAML settings
Step 4 — Set SP metadata in the Auth0 SAML settings. The Application Callback URL should look like the following:
https://screenlyapp.com/sso/complete/saml/?idp=[domain]&RelayState=[domain]
The [domain] is the owner’s team domain (remove the braces from the URL). It is shown in your Screenly URL address bar in your browser.
Here is an example of how the complete Application Callback URL should look: https://screenlyapp.com/sso/complete/saml/?idp=mysupportcompany&RelayState=mysupportcompany
Please find the other two properties to change below:
{
    "audience": "login.screenlyapp.com",
    "recipient": "https://screenlyapp.com/sso/complete/saml/"
}
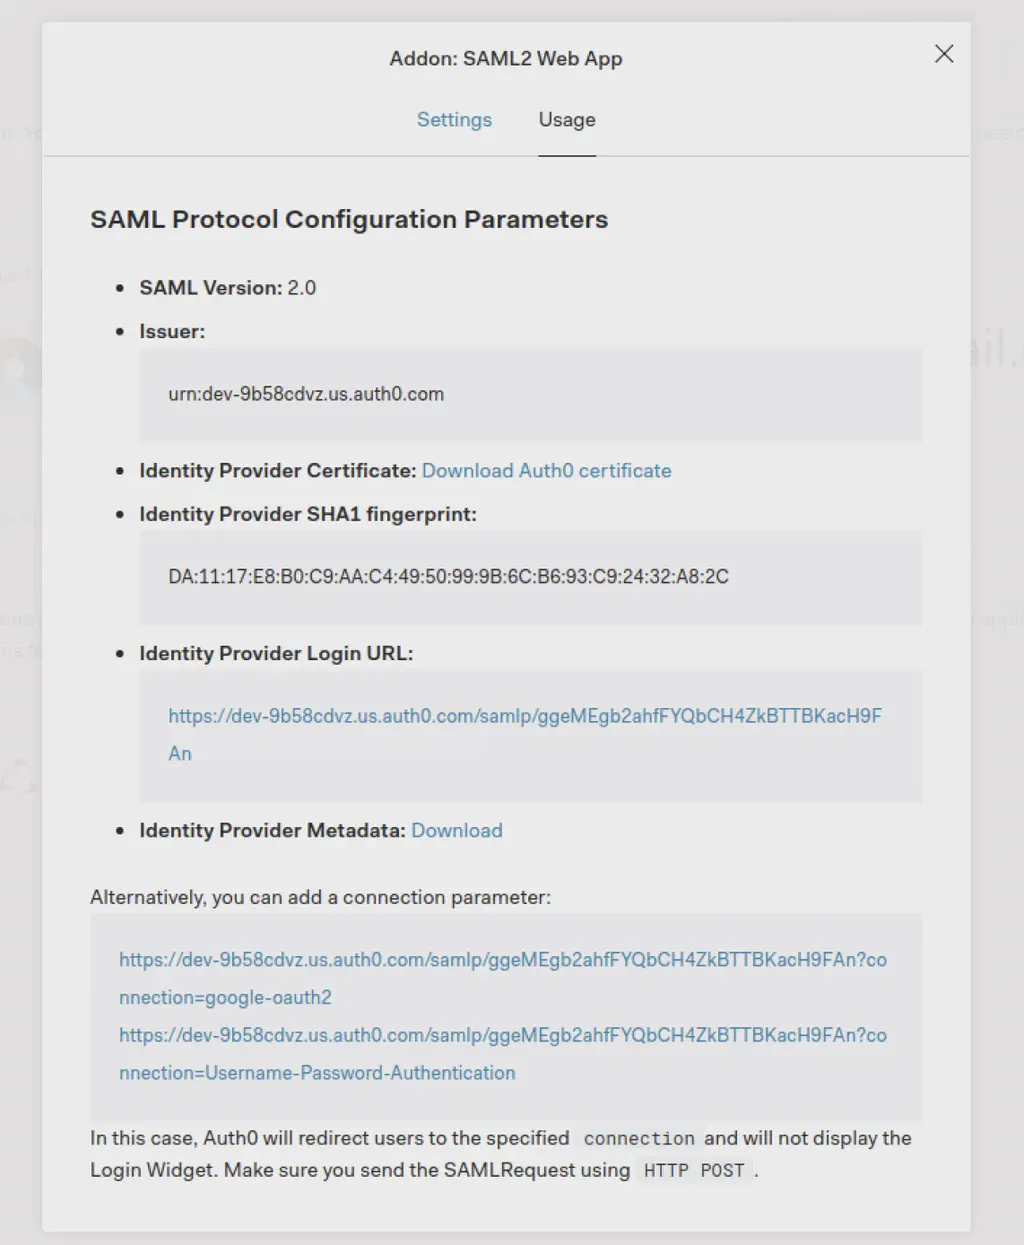
Step 5 — Get Auth0 IDP settings. The issuer is the entity ID and the Identity Provider Login URL is the single sign-on URL. The certificate is the Identity Provider Metadata. You can copy it from the generated file (remove the BEGIN and END lines from the X.509 certificate when pasting into Screenly).
Step 6 — Log in to Screenly, and configure the following inside of your Screenly SAML settings (Screenly → Settings → Team). These should also match the same attribute fields within your Auth0 configuration:
- Email: http://schemas.xmlsoap.org/ws/2005/05/identity/claims/emailaddress
- Name: http://schemas.xmlsoap.org/ws/2005/05/identity/claims/nameidentifier
You may also remove the user_id row from the attributes within Auth0, as this matches the name attribute above.
Step 7 — Save the configuration, and now SAML should be configured. You can test this by clicking the Copy URL button below the SAML settings in Screenly, logging out of Screenly, then pasting the URL into the browser to login.
That completes the setup.
What is the user authorization process with SAML?
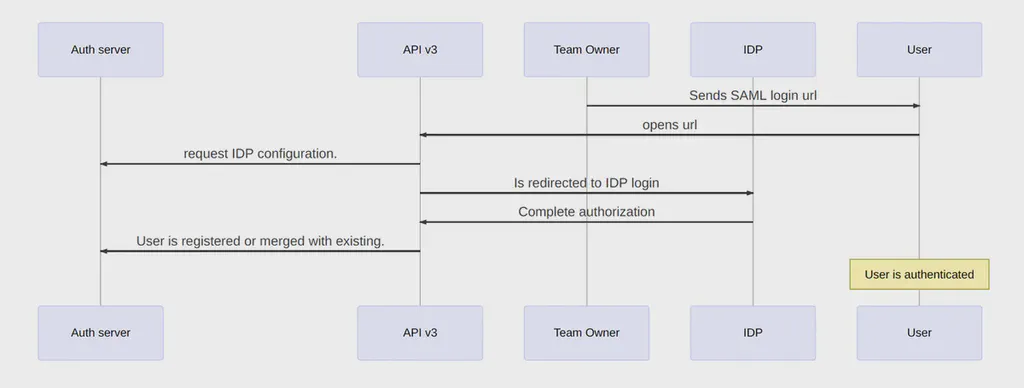
First, the owner sends the SAML login url. This is necessary to invite a new user.
Next, the user redirects to the IdP authorization screen.
The next step is for the user to complete authorization. When the user completes IdP authorization, the IdP redirects the user back to Screenly with the IdP’s response.
The user can then register as a new user or, if the user already exists, the user can merge his or her account. This process is the same registration process as SSO.
That’s it
The user is now authenticated and is redirected to the Screenly dashboard.
If you have any questions, feel free to reach out to Screenly Support! You can submit a support ticket here.