Datadog helps teams monitor their infrastructure and visualize data on custom dashboards. Users can combine infrastructure performance and business metrics using multiple data sources.
We use Datadog internally at Screenly to monitor all sorts of data, including data from Google Cloud and Kubernetes. When company metrics are easily accessible and top-of-mind among employees, teams can use that data to make more informed business decisions.
With Screenly, Datadog users can display real time dashboards to their teams using existing TVs and monitors. Follow the steps below to display your Datadog dashboards with Screenly.
Steps for showing Datadog metrics on a digital sign
To show a live Datadog dashboard on a digital sign, you will first need to generate a public share link for your dashboard. To do so, first log in to your Datadog account.
From the left-hand menu, click on “Dashboards”. Next, click “Dashboard List” from the sub-menu.
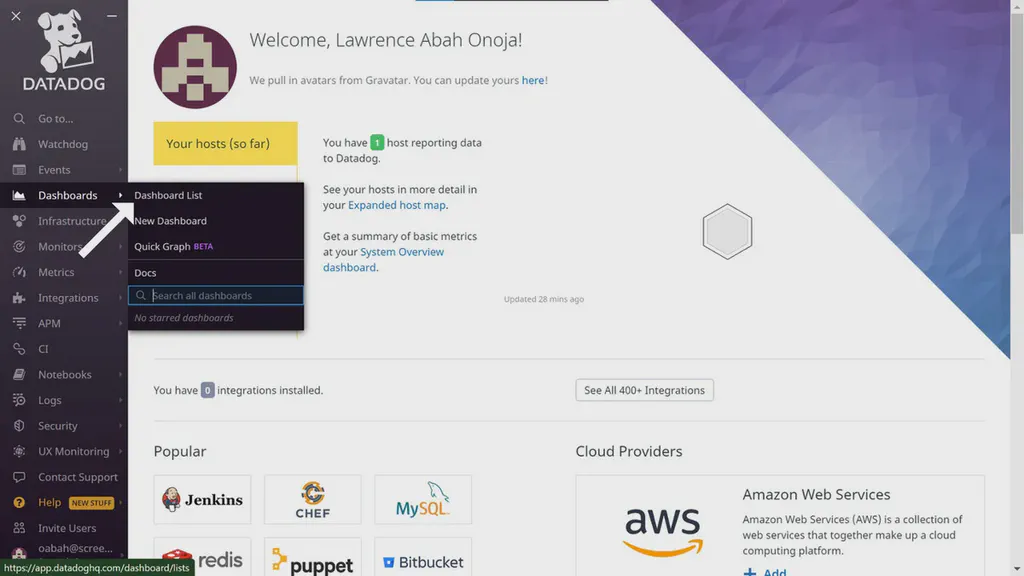
Click on the dashboard you wish to display from the list. In this case, the dashboard name is “Test Dashboard”.

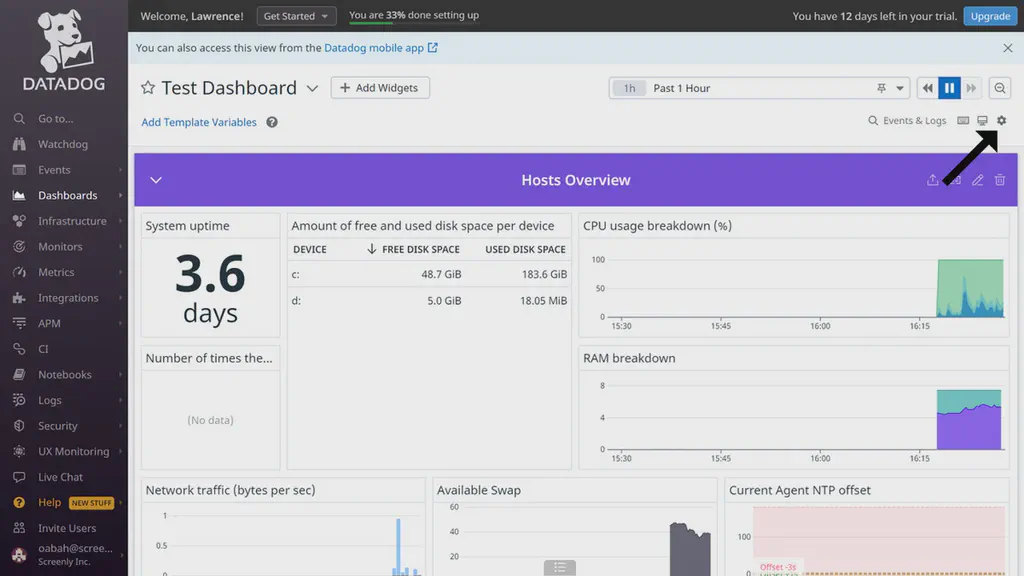
After your selected dashboard opens, click the settings/gear icon on the top right of the screen.
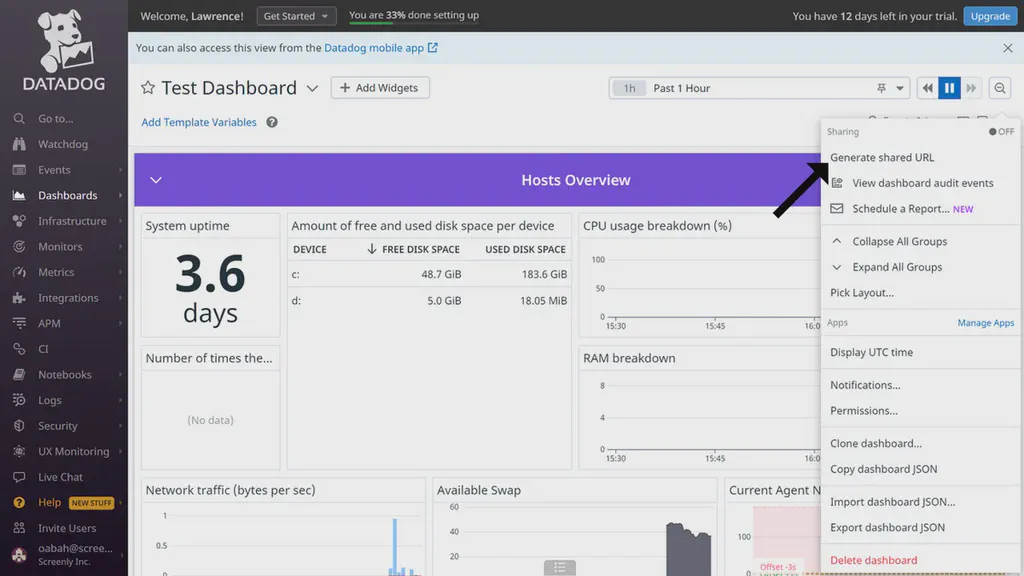
Then, click on “Generate shared URL” from the dropdown menu.
In the new popup that loads, select the permission level that reads “‘Anyone with a link (public)’ can access this dashboard”. This will grant Screenly access permissions to the dashboard you wish to display.
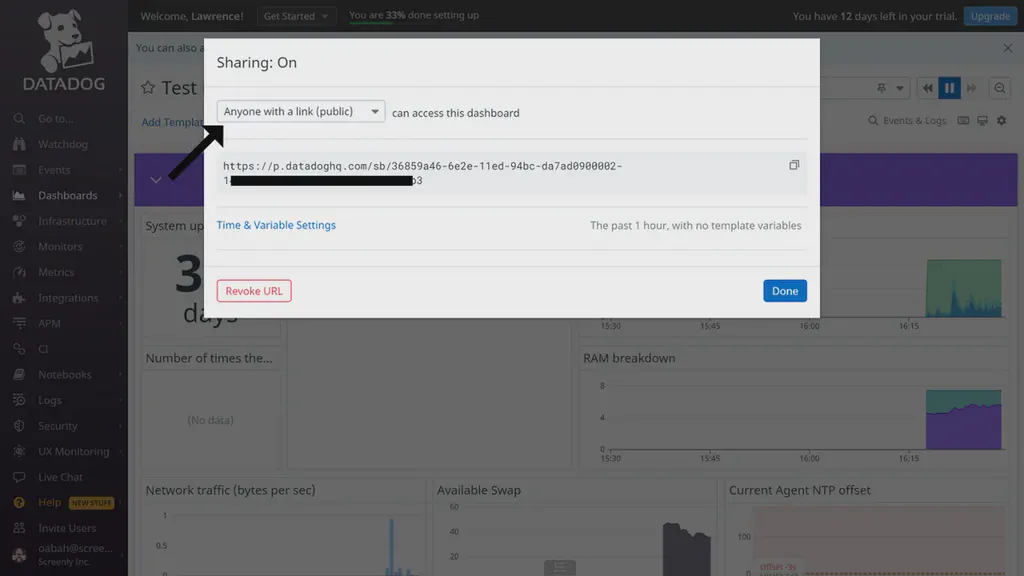
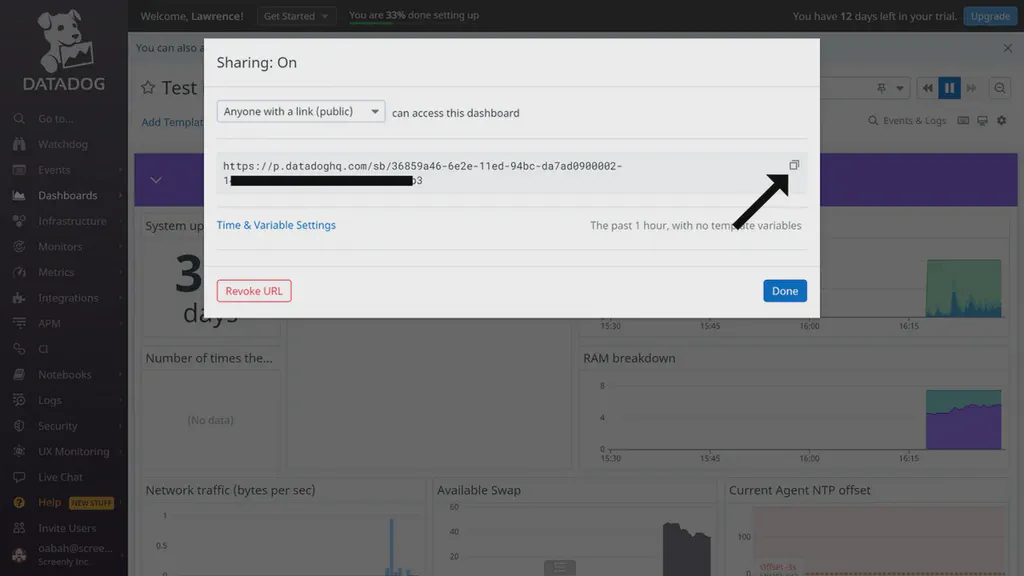
After setting the URL configuration, copy the generated URL to your clipboard.
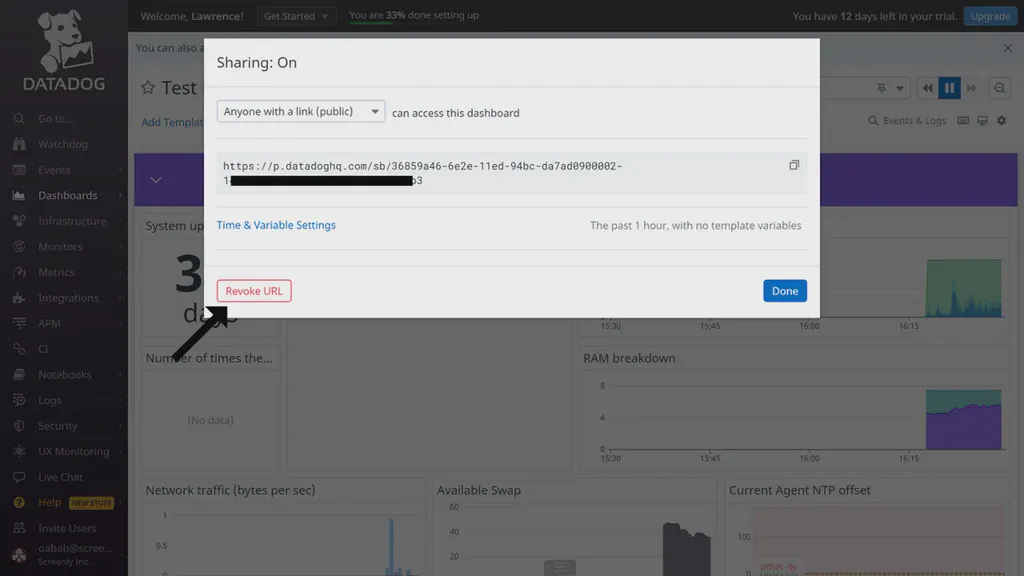
Note that you can revoke a public URL to a dashboard at any time. Being aware of this feature is important, as teams often display sensitive company information using Datadog. To revoke a public URL, go to the Dashboard List page. Next, select the dashboard and click the settings/gear icon on the top right of the screen. Next, click on the “Configure sharing” section and click the “Revoke URL” option.
Setting up your digital sign
Now that you have your public URL, the next step is setting up your digital sign. The first step for creating a digital sign is to purchase a digital signage player. A digital signage player is a small physical device that renders content to your TV or monitor. Screenly offers the Screenly Player and Screenly Player Max. You can then pair your digital signage player and associated screen to your online Screenly account.
The next step for showing your Datadog dashboard on a digital sign is adding the public URL for the dashboard to your online Screenly account. To do so, follow the steps below.
Log in to your Screenly account here. If you do not have a Screenly account, register for a 14-day free trial.
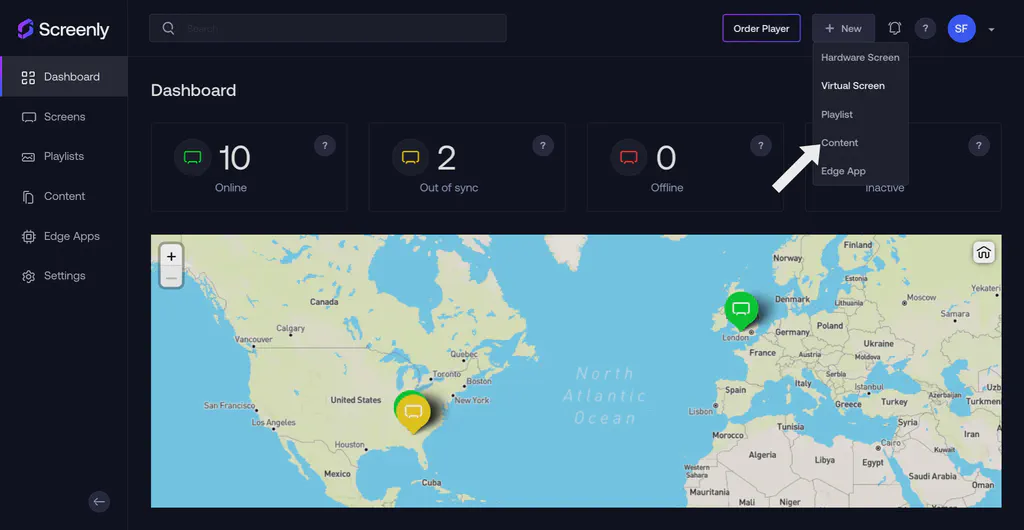
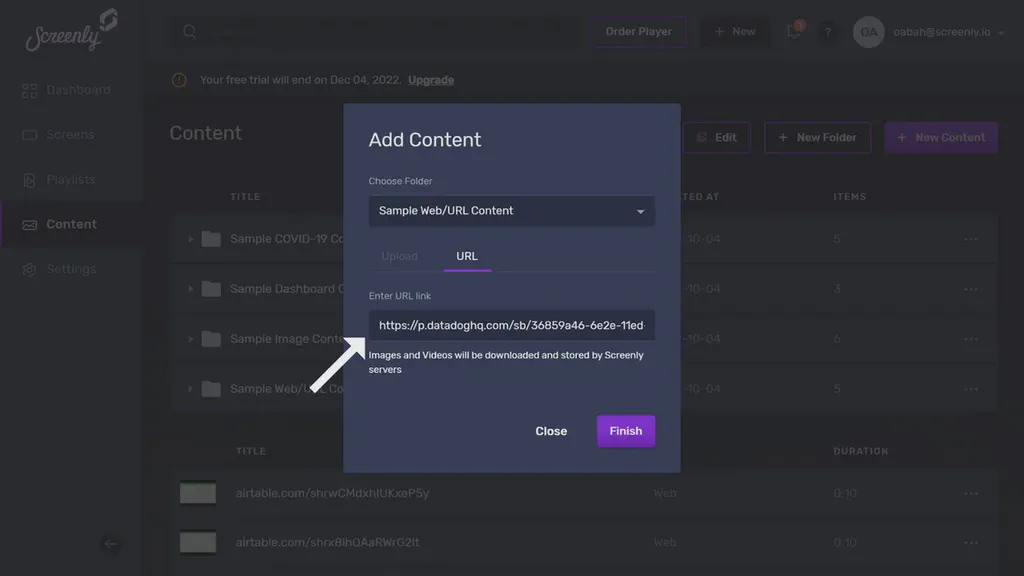
After logging in to your Screenly account, click on the “New” button on the top right of your screen. Then, click on the “Content” tab in the dropdown menu.
Next, click the URL tab in the popup modal and paste the public URL into the “Enter URL link” input field. Be sure to click “Finish” on the bottom right after you successfully add the URL.
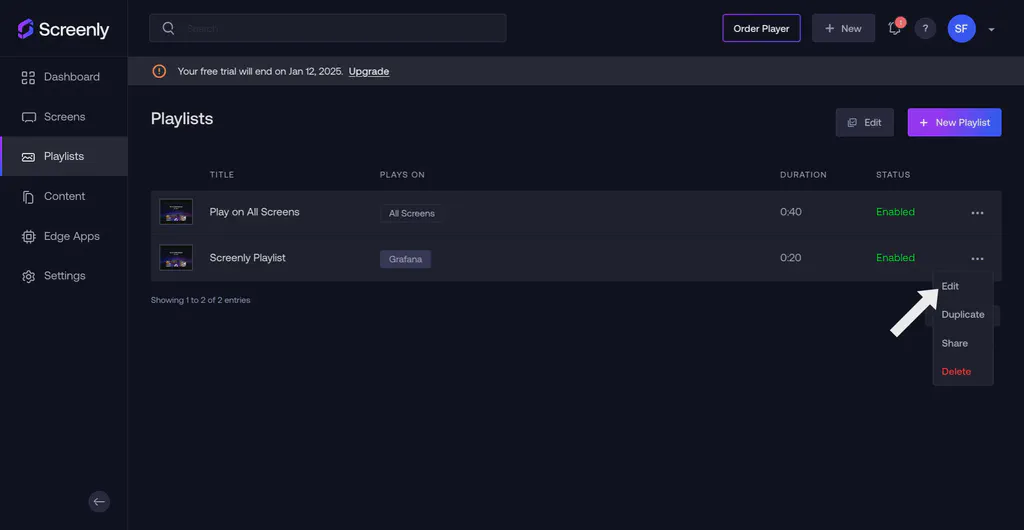
With the above steps completed, you can now add this asset to a playlist. To do so, click the “Playlist” tab from the left-hand menu. If you wish to add a new playlist, click the “+ New Playlist” button on the top right of the new screen that loads. To edit the new playlist or a previously existing playlist, click the three-dots icon on the right of the playlist that you wish to edit. Next, click the “Edit” tab.
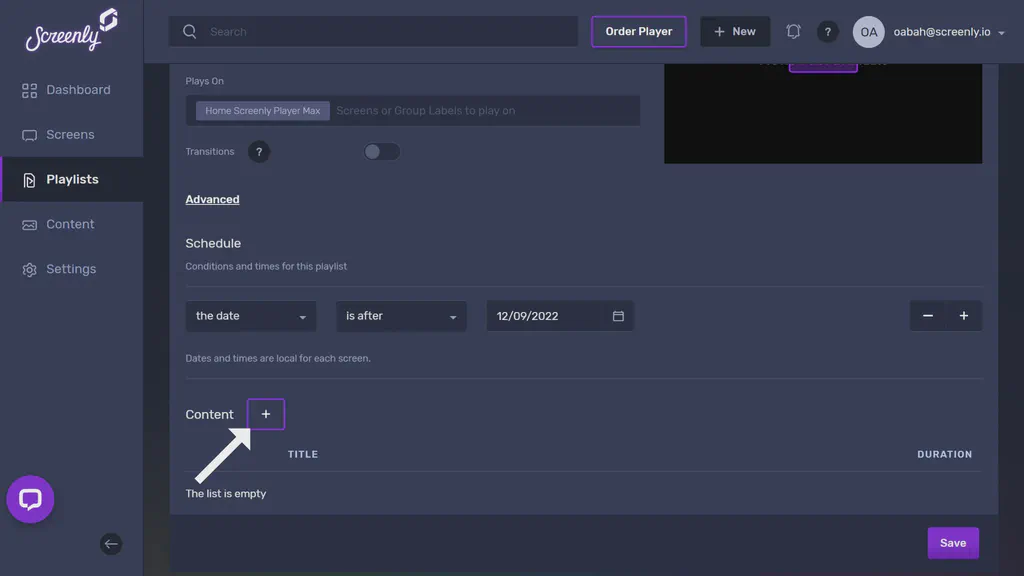
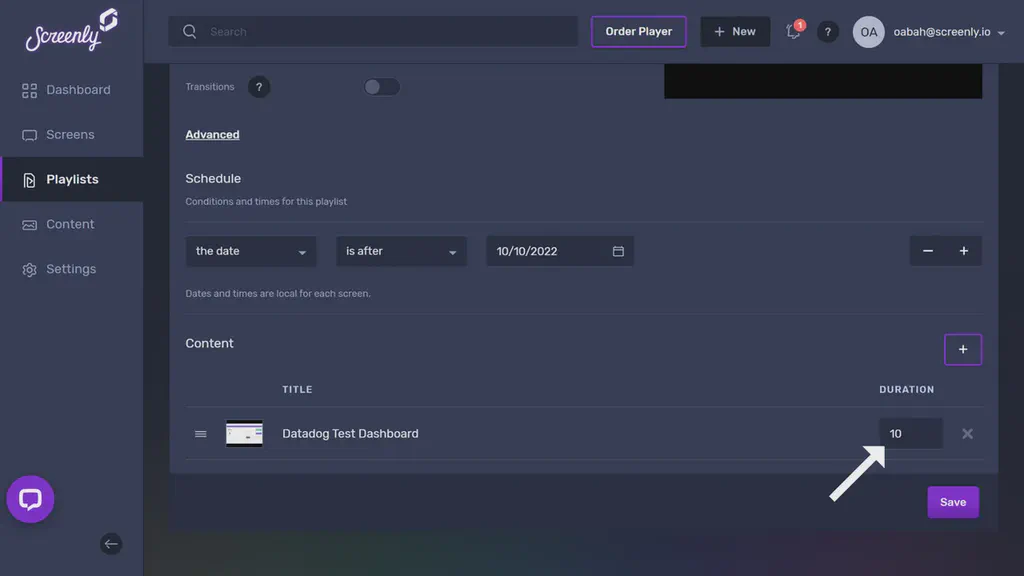
Within the playlist, click the “+” icon in the Content section. From there, you will see a popup that will allow you to add the Datadog dashboard to the playlist from your content collection.
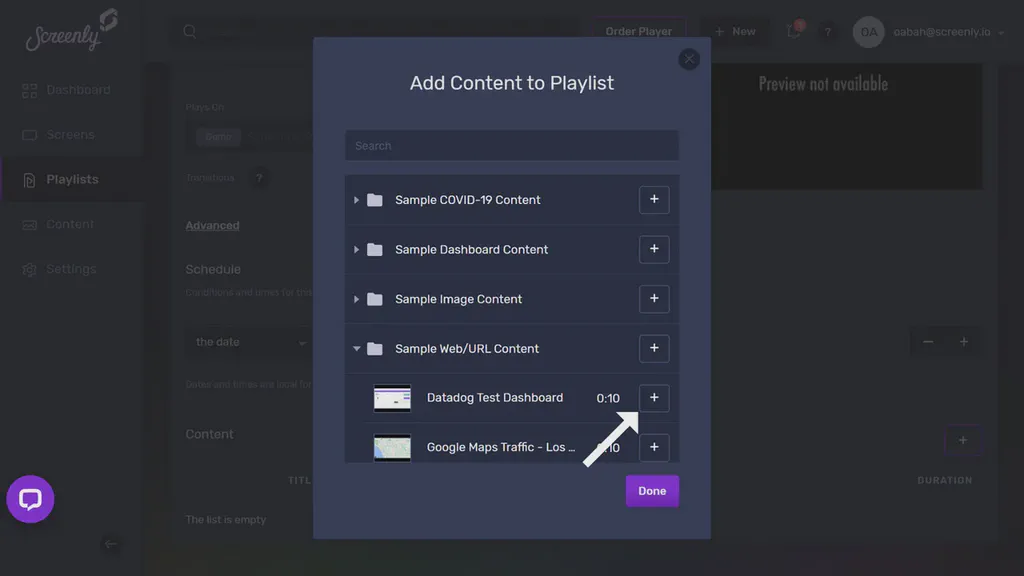
In the new “Add Content to Playlist” popup, find your Datadog dashboard content and click the “+” button next to the file. Then, click the “Done” button below.
You will then see your Datadog Dashboard in the playlist’s content section. Next to the dashboard content listing, change the listing’s duration to the time you want the dashboard display on your screen. Be sure to click “Save” on the bottom right.
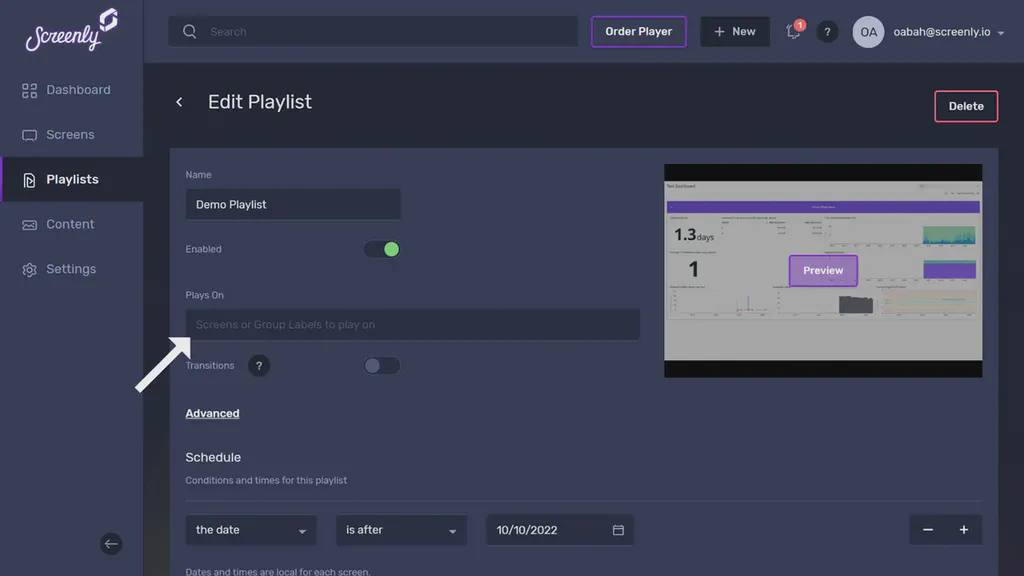
To assign the playlist containing the Datadog dashboard content to a screen, click on the “Plays On” input field in the “Edit Playlist” section.
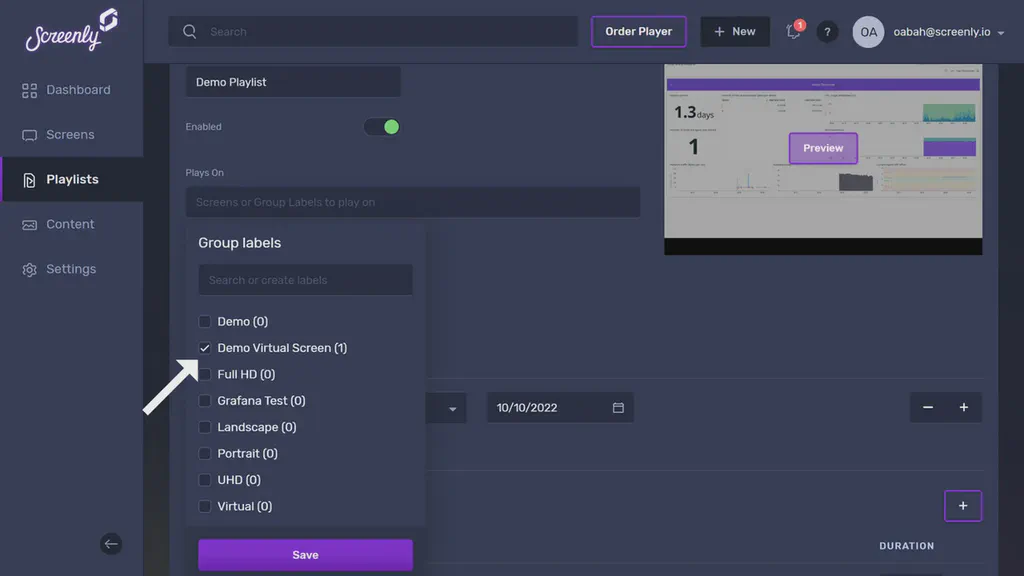
A dropdown will appear containing all your screens and group labels, select the screen(s) or group(s) of screens you would like the playlist to show on. Make sure to click “Save” at the bottom of the dropdown after selecting the screen(s) or group(s) of screens you want.
Once you assign the playlist containing the Datadog dashboard content to your screen(s) or group(s) of screens, your Datadog Dashboard will display on your TV or monitor in just minutes.
Show your Datadog dashboards on a digital sign
Displaying Datadog dashboards on a digital sign helps keep teams motivated and focused on company goals. When everyone can see key metrics and performance data, everyone can act on that information, too.
To see if Screenly works for your organization, sign up for a 14-day free trial. If you have any questions about how Screenly may meet your needs, reach out to Screenly Support at any time.