A quick screencast on how to create content for Screenly using PowerPoint.
Microsoft PowerPoint is likely the most popular presentation software on the market. For a lot of users, it is not only the go-to tool for presentations but also for creating charts and illustrations for their business cases.
Because of this widespread use of PowerPoint, we have received a lot of requests on how to display a PowerPoint presentation on a TV or any screen with Screenly. However, due to the proprietary nature of Microsoft PowerPoint files, there is no way for us to natively support displaying these files.
We do, however, recommend one of the following workarounds for your slide display.
Before you begin, we recommend that you change the resolution of your slide deck to 1920x1080 pixels, which is the resolution Screenly uses.
Export your slide deck as images
Perhaps the easiest way to display a PowerPoint presentation on a TV in Screenly is to simply export your slide deck as images.
For more information on how to export your slide deck to images, please see this article.
Once you have your presentation exported as images, you can just add them all as image content items in Screenly. Read below to see detailed steps on how to add images to Screenly.
Export your slide deck as a video
Another way of using PowerPoint presentations with Screenly is to export the presentation as a video. Details on how to do that can be found here.
With the video exported, just add it as a video content item to your online Screenly account.
Please note that if you are using Anthias (formerly known as Screenly OSE), you will likely need to re-encode the video such that it uses a supported video codec. For Screenly’s paid version, on the other hand, this re-encoding will happen automatically.
Upload your Powerpoint slide deck to Google Slides
Lastly, you may want to use Google Slides (which is a part of Google Drive) with Screenly. To upload your PowerPoint slide deck to Google Slides with Screenly, simply follow the steps below:
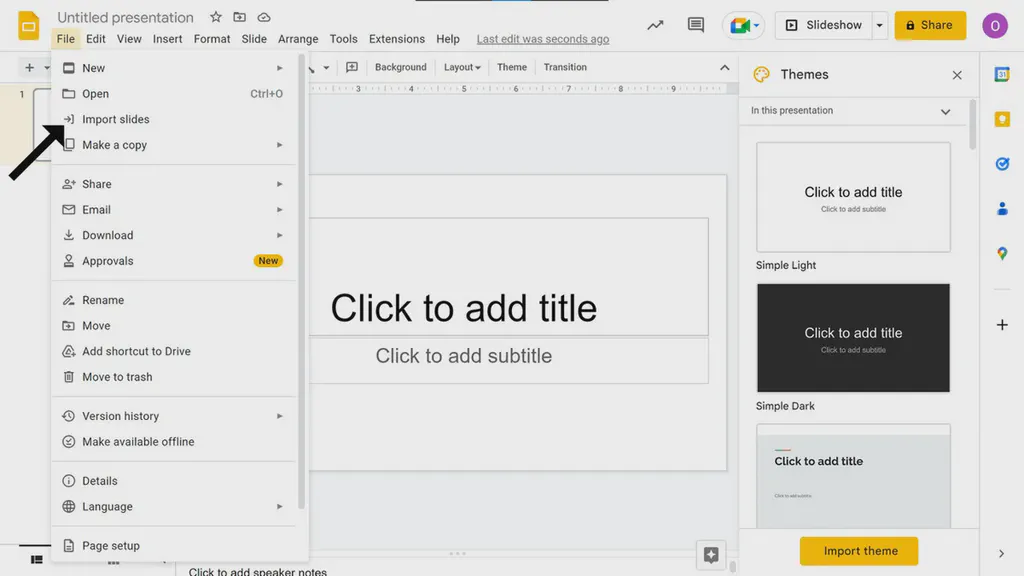
Start a new presentation on Google Slides. Click on “File” to open a dropdown menu. From the dropdown menu, click on “Import slides”.
Click on the “Upload” tab.
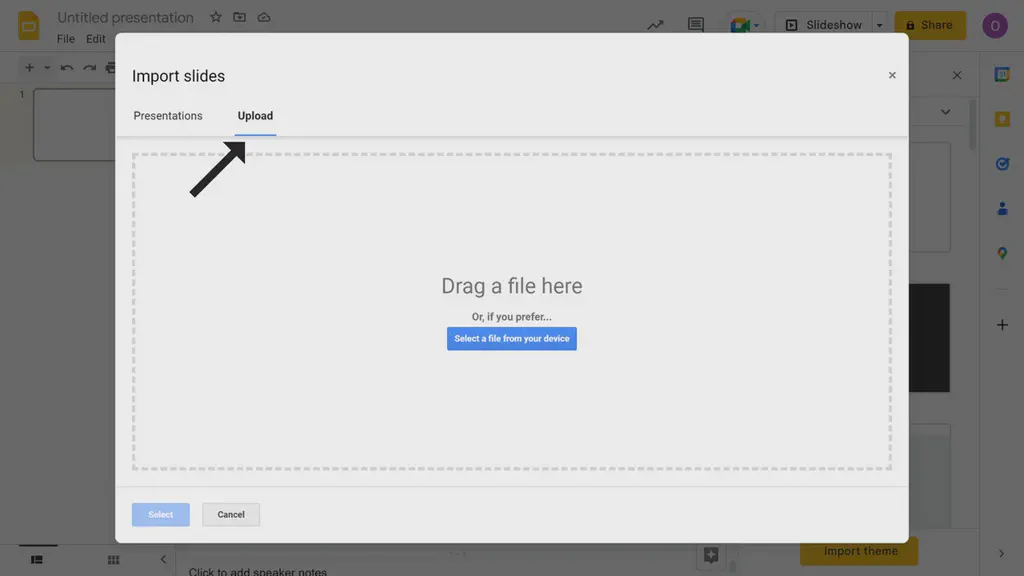
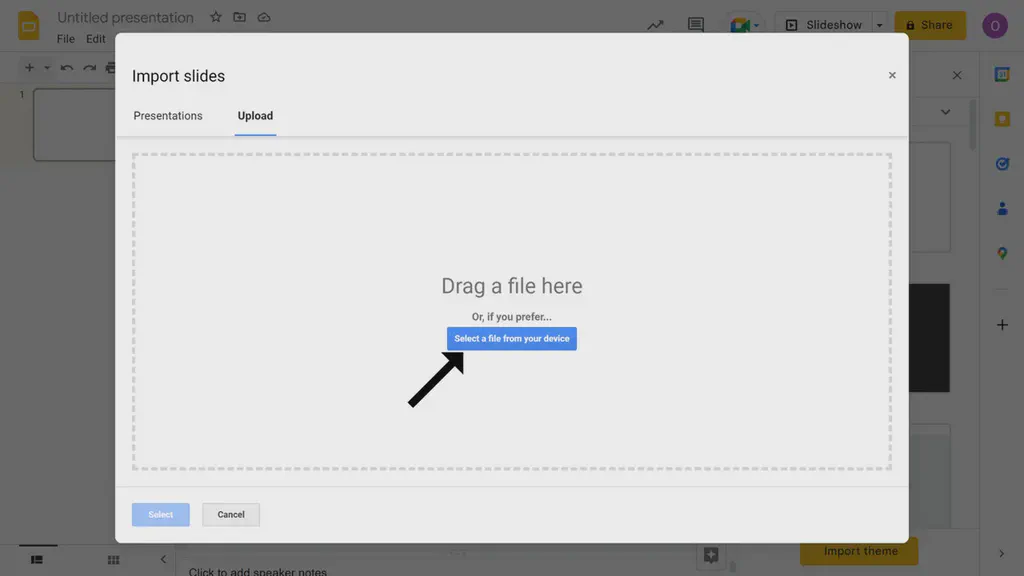
Drag and drop your PowerPoint file onto the new popup modal or click the area below the “Upload” tab to find the file on your computer.
After selecting the PowerPoint file, select the slides you would like to import from the popup modal, then click on “Import Slides”.
You can then proceed to save the Google Slides file. Click here to view our detailed article on how to display google slides on TV with Screenly.
Adding image/video as content to Screenly
The next step for showing your PowerPoint deck on a digital sign is adding the images or video file to your online Screenly account. To do so, follow the steps below.
Log in to your Screenly account here. If you do not have a Screenly account, register for a 14-day free trial.
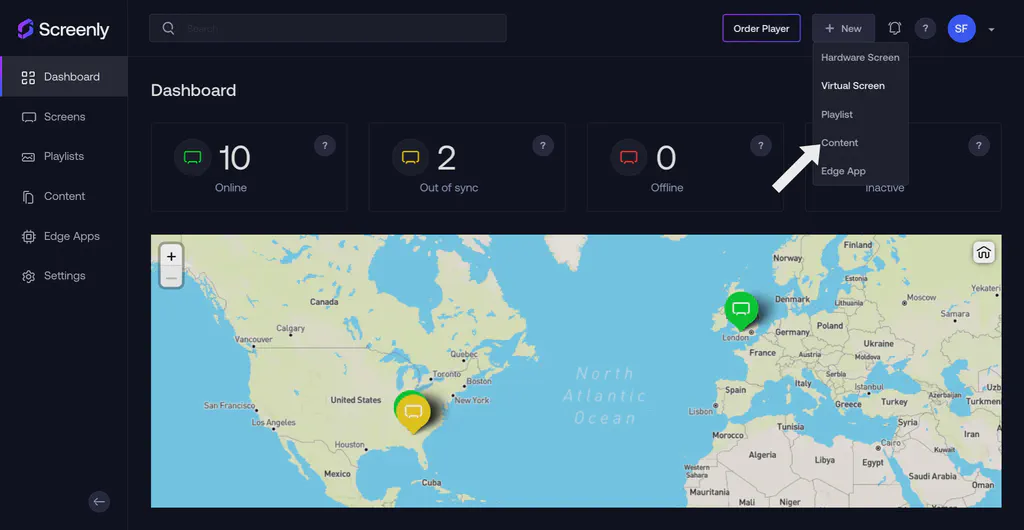
After logging in to your Screenly account, click on the “New” button on the top right of your screen. Then, click on the “Content” tab in the dropdown menu.
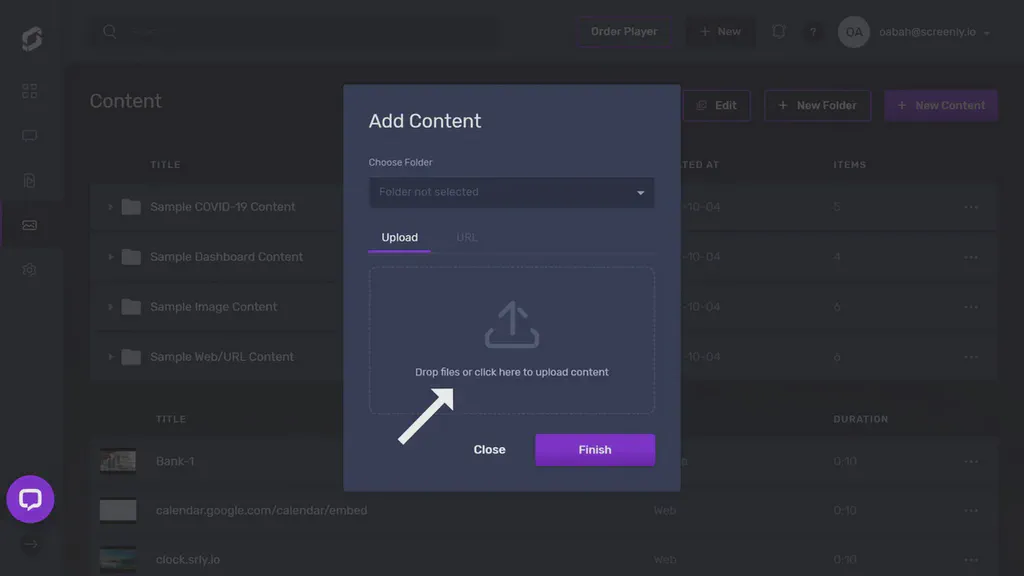
Drag and drop your images/video onto the new popup modal or click the area below the “Upload” tab to find the files on your computer. After your files upload, click the “Finish” button on the bottom right of the popup modal.
Having done the previous steps, you have successfully added your PowerPoint content to your online Screenly account. The next step is to add your content to a playlist and add a screen to your account. Click on the links to watch a video on each step or continue reading this article for more information on how to do so.
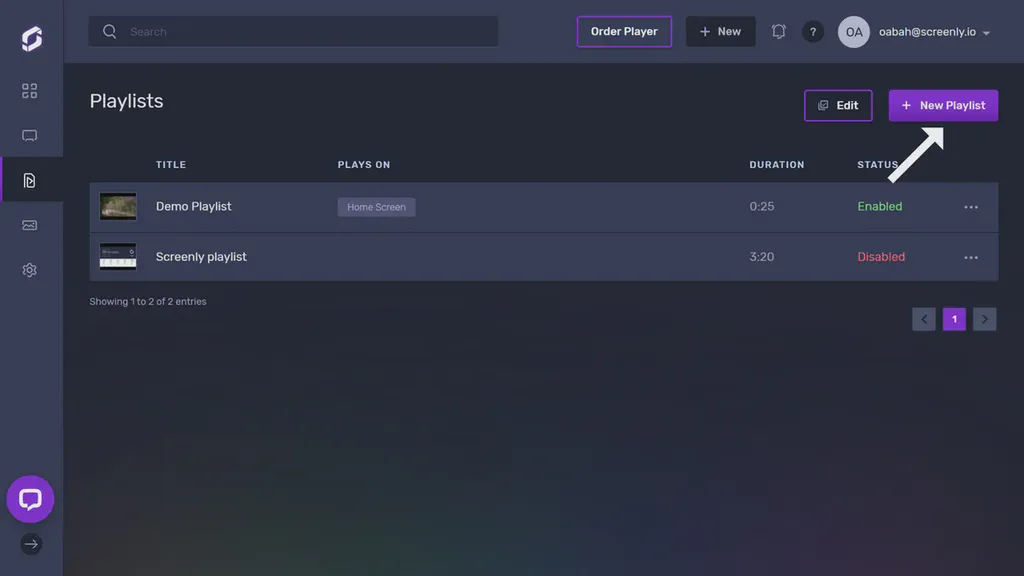
To add your content to a playlist, click the “Playlist” tab from the left-hand menu. If you wish to add a new playlist, click the “+ New Playlist” button on the top right of the new screen that loads. To edit the new playlist or a previously existing playlist, click on the name of the playlist you wish to edit from the list of playlists.
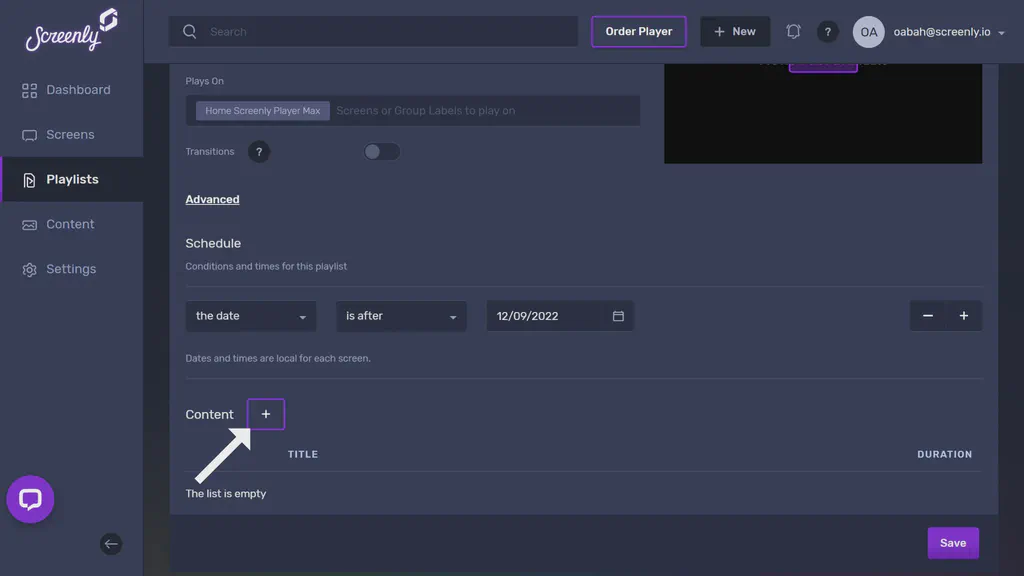
Within the playlist, click the “+” icon in the Content section. From there, you will see a popup that will allow you to add the PowerPoint content to the playlist from your content collection.
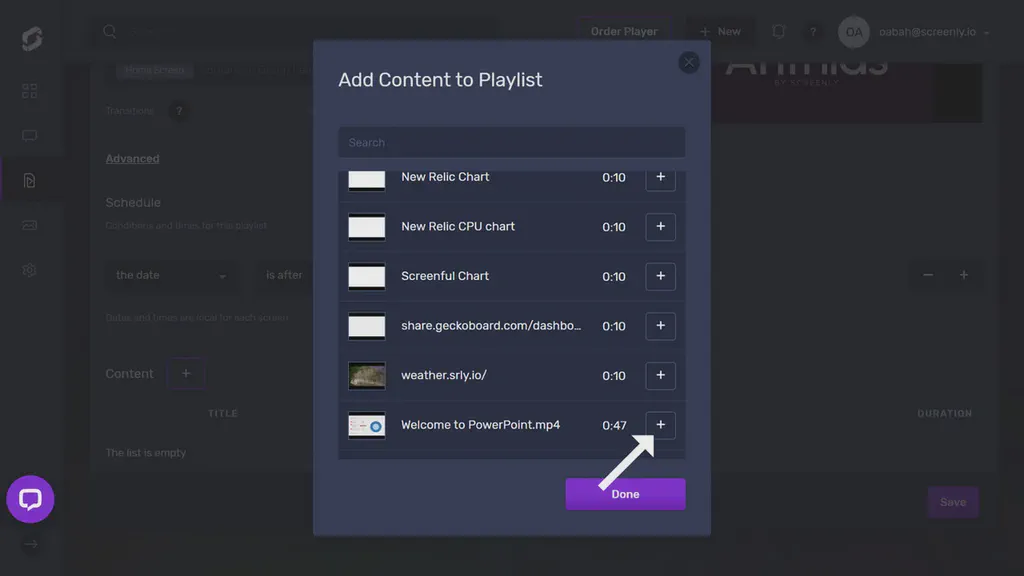
In the new “Add Content to Playlist” popup, find your PowerPoint content and click the “+” button next to the file. Then, click the “Done” button below.
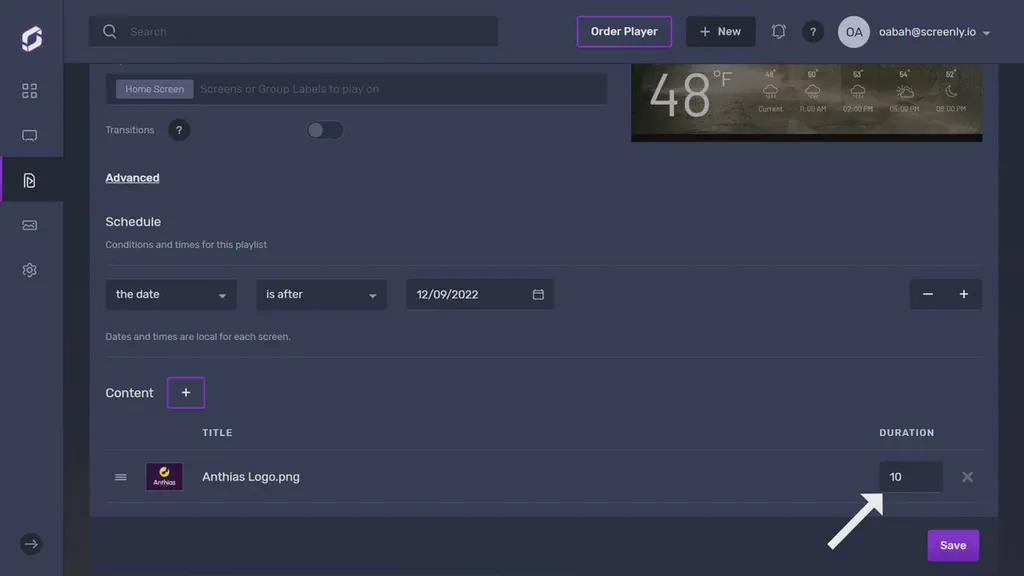
You will then see your PowerPoint content in the playlist’s content section. If you are using an image next to the content listing, change the listing’s duration to the time you want the content to display on your screen. Be sure to click “Save” on the bottom right. If you’re using exported images, make sure to add all the images to the playlist and set the duration you want for each image slide.
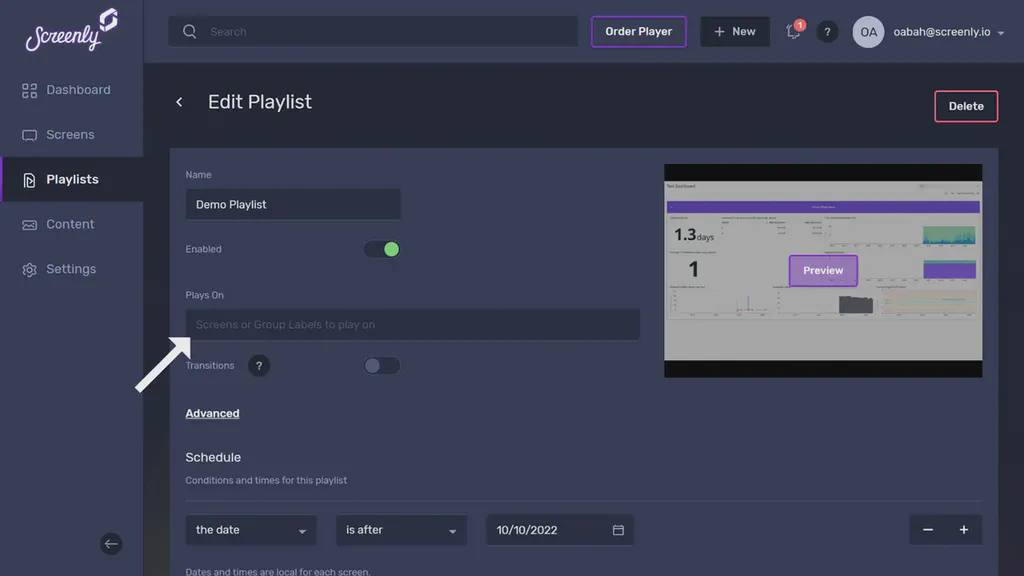
To assign the playlist to a screen, click on the “Plays On” input field in the “Edit Playlist” section.
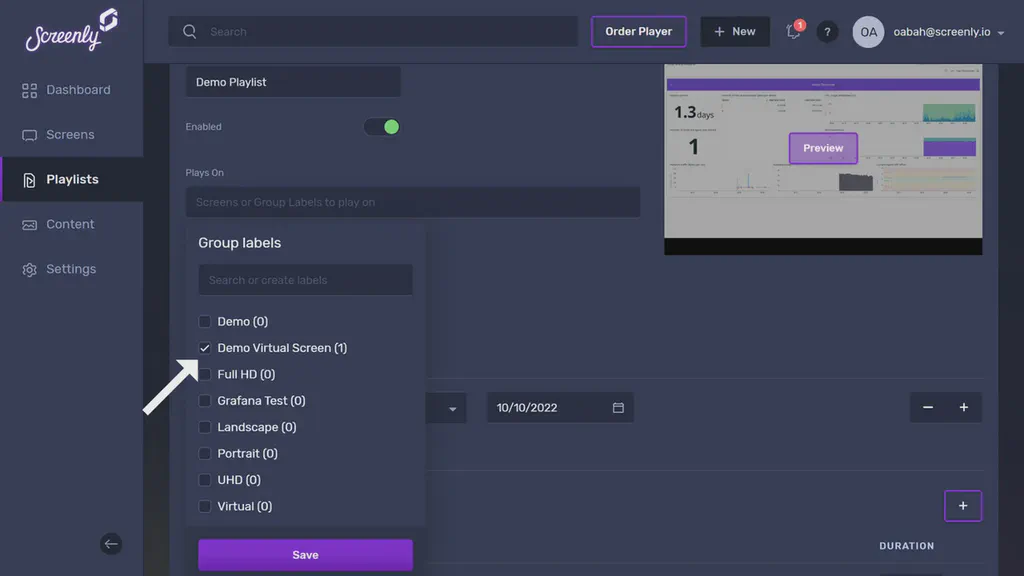
A dropdown will appear containing all your screens and group labels, select the screen(s) or group(s) of screens you would like the playlist to show on. Make sure to click “Save” at the bottom of the dropdown after selecting the screen(s) or group(s) of screens you want.
Once you assign the playlist containing the PowerPoint content to your screen(s) or group(s) of screens, your PowerPoint content will display on your TV or monitor in just minutes.
Get started
Ready to give Screenly a shot? Sign up for Screenly and get started with a 14-day free trial.