DashThis is a reporting platform that turns marketing metrics into easy-to-read dashboards — perfect for keeping teams and stakeholders on the same page.
With Screenly, you can broadcast a Dashthis dashboard on any digital sign in real time. Below is a quick, step-by-step guide to get your dashboard up and running.
Add a screen in Screenly
If you’re new to Screenly, start a free 14-day trial (no credit card required). Already have an account? Log in here and open your Screenly dashboard. Once your at your Screenly dashboard:
- Click Screens in the left sidebar.
- Select Add Screen or + New Screen.
- Choose Screenly Anywhere (our browser-based player).
- On the device you’ll use as a sign, visit anywhere.screenly.io and copy the pairing code.
- Paste the pairing code in Screenly, give the screen a name such as Test Screen, and click Add.
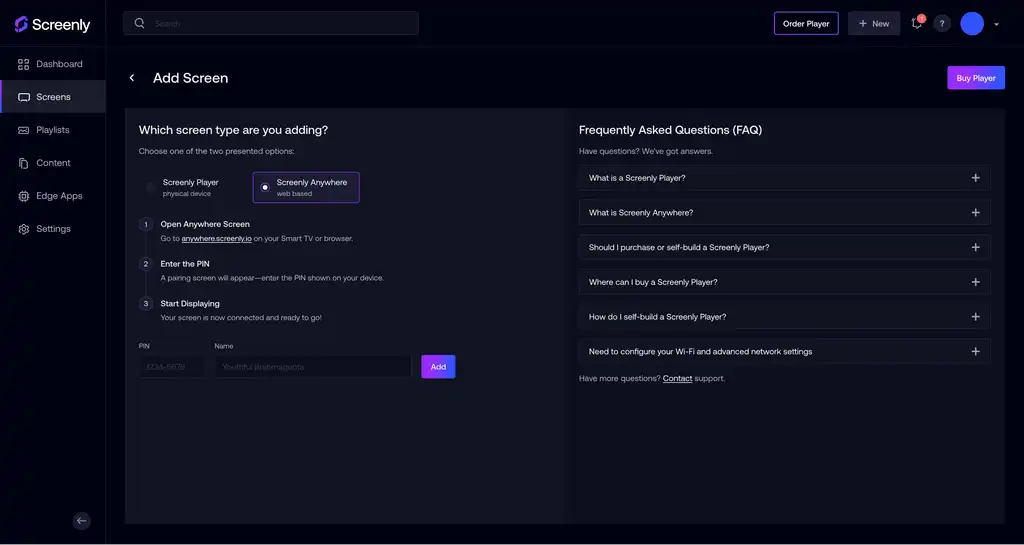
Your screen is now linked and ready for content.
Create a share link in Dashthis
Open a new tab, sign into your Dashthis account, and pick the dashboard you want to display (e.g., an email-marketing report).
Tip: A digital sign can’t scroll, so aim for a dashboard that fits in a single screen or use a one-widget view.
Once you’ve navigated to your Dashthis dashboard that you wish to display:
- Click the Share icon on the top right.
- Under Share a link, click Copy link to copy the public URL to your clipboard.
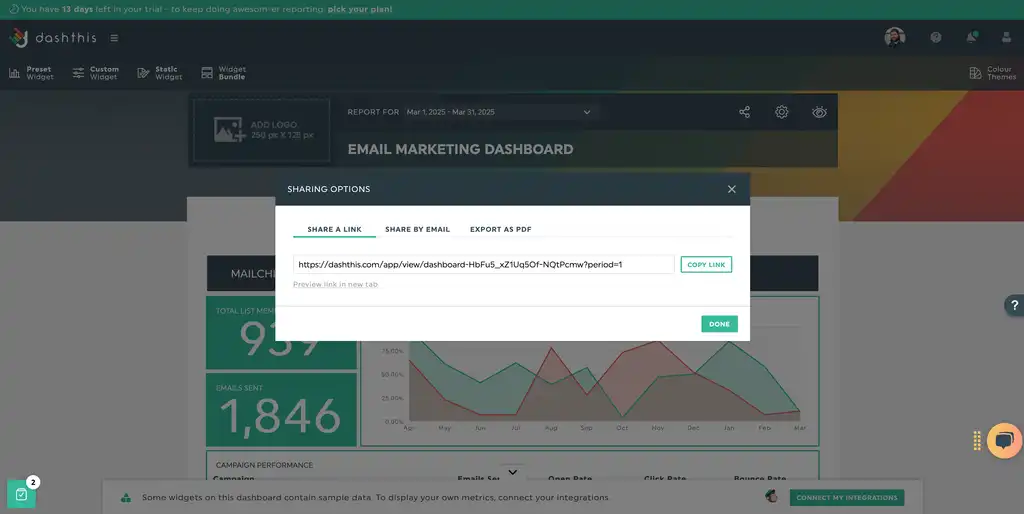
Now, navigate back to your Screenly dashboard and add your Dashthis link as content.
Add your DashThis link as a content item
Return to your Screenly dashboard:
- Click Content in the lefthand sidebar menu.
- Hit + New Content (upper-right).
- In the modal, choose URL.
- Paste in the Dashthis public share link and click Finish.
- Name the item something like Dashthis Dashboard and click Save.
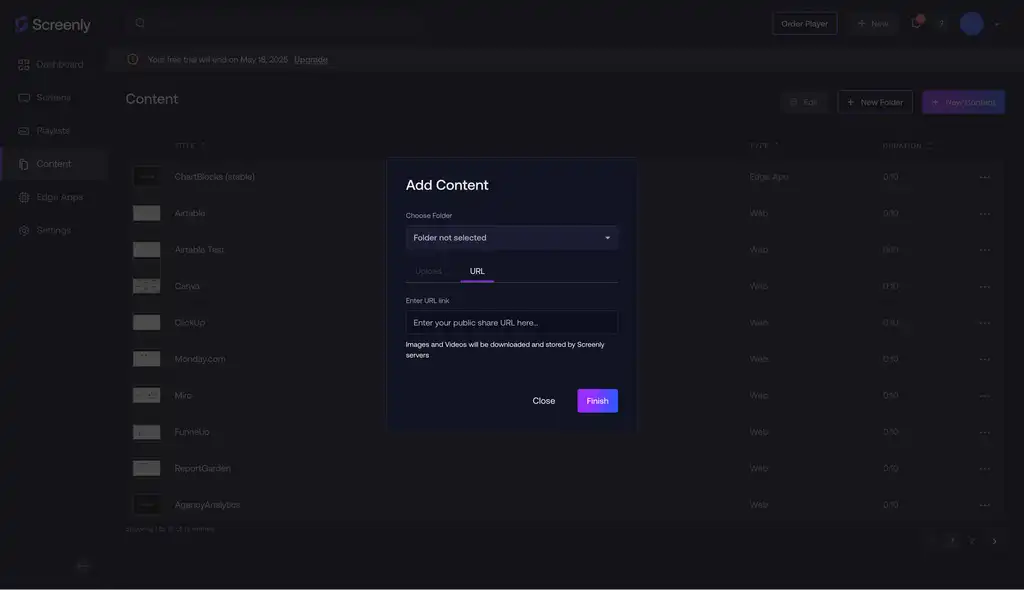
Your Dashthis dashboard is now stored as a content item.
Build a playlist and schedule it
Now that you have your Dashthis content added to your Screenly account, you need to assign that cotent to a playlist. You also need to assign your Test Screen to that playlist. Complete the following steps:
- Click Playlists in the sidebar menu.
- Select + New Playlist on the top right.
- Name the new playlist Dashthis Playlist or something else that is relevant.
- Under Plays On, pick the screen you paired earlier (e.g., Test Screen).
- Click the + button next to Content, choose the Dashthis dashboard content item, then click Done.
- Adjust scheduled start date so that it is before the current date and time (for immediate playback).
- Optionally,set the contentDuration (e.g., 30 seconds). If it’s the only item, it will loop continuously.
- Click Save.
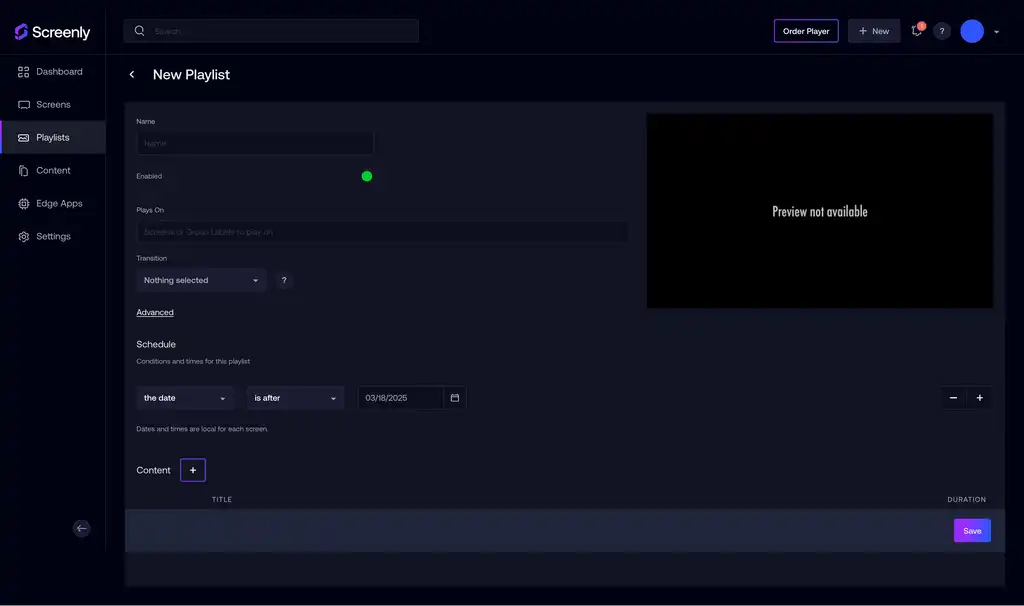
That’s it! Your Dashthis dashboard will now display on your Screenly digital sign.
See it live
Open the Screenly Anywhere tab on your display screen. Your DashThis dashboard should appear full-screen, automatically refreshing as your metrics change. You now have your Dashthis dashboard on your digital sign!
Bring data to the forefront
DashThis makes reporting simple, and Screenly makes those reports visible. Reports and metrics aren’t useful if your team can’t see them. Use the Screenly and DashThis combo to spotlight KPIs in offices, retail spaces, or remote hubs — wherever quick insights drive action.
Ready to get started? Start your Screenly free trial today, drop in a DashThis link, and keep your team informed at a glance.
Need help? The Screenly Support team is ready to assist.
